This blog is part of a series on Teams. For more articles, check back often
Written: 15/01/2022 | Updated: N/A
Last week, we managed to do a lot on the new security features included within Teams Premium – Watermarking, End to End Encryption, Custom Meeting Templates and then onto the culmination which was Sensitivity Labels. This week, we are going to change tack and discuss the new Webinar functionalities within the new Webinar setup experience. There is a lot. This includes creating a Webinar waiting list, manually approving registrants, presenter bios and limiting the time and day people can register. Most of these functionalities are within the flow of the new setup experience, however, there are some other things which may not be top of mind – at least from an administrative perspective. So let’s spin through a setup end to end to look at the new functionalities, and this will also tack on implementing a custom event policy in PowerShell (optional) as well as adding the privacy statement in Azure AD (also optional). Of course, I would love at this point to be able to tell you that we can go ahead and simply apply all the nice security features we covered last week to webinars created via the new experience. Unfortunately, this isn’t the case. At least not at the time of writing. No watermarking, no E2EE, no Sensitivity Labels, not even custom meeting templates. But, on the positive side we can see where the direction is going – all of these new security features will hopefully come into the new webinar experience at a later date, and in the meantime, as I will explain later in the blog, we can still leverage the functionalities via classic webinars which is how most will create webinars when they don’t have Teams Premium, and which is still available to Teams Premium users
Let’s go!
This blog will cover
- Getting Teams Premium Trial
- Enabling the new experience and using a Custom Events Policy with PowerShell
- Setting the Privacy Statement in Azure AD
- Setting up a Webinar
- Leveraging advanced security features through Classic Webinars (Meeting Registration)
- FAQ
Note: this blog may have some abridged steps which will assume some experience with Teams. This blog is using a Ring 4 tenant with GA functionality. Teams Premium will be a trial sign up, but will soon be orderable via Microsoft 365 Portal or your CSP Partner
Prerequisites
- Global Admin for trial sign up and Entra configuration.. Global Admin or Teams Admin for PowerShell and TAC configuration.
- Microsoft 365 Licence for Teams for testing
- Teams Premium Trial Licence for users
- Ensure Teams Client is up to date on the latest version (Tested on 1.5.00.34874 (64-bit))
GETTING TEAMS PREMIUM TRIAL
Ok, so the tenant I am using is not using Teams Premium so I will need a Teams Premium trial.
1.) Go to https://aka.ms/tpdlnk and login with the global admin credentials

2.) Select Start Free Trial. Currently in this trial only 1 licence is permitted

3.) Select Try Now

4.) Select Continue

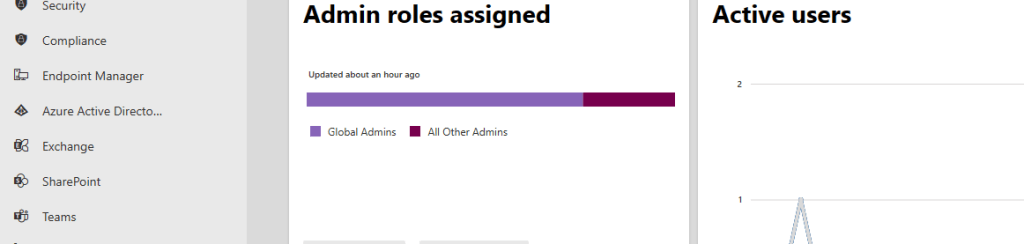
5.) Wait a few minutes and the licence will be provisioned to the tenant. In the Microsoft 365 Admin Centre select Users then Active Users

6.) Select the User to assign the Teams Premium Licence to, then Manage Product Licences. Tick Microsoft Teams Premium and then Save Changes. All set up and ready to go.

ENABLING THE NEW EXPERIENCE AND SETTING A CUSTOM EVENTS POLICY IN POWERSHELL
Now we have created the trial and assigned it to the users we will now need to enable the new webinar experience for Teams Premium Users. At this point we also have the option of creating a custom events policy.
The very first step is to ensure that your Teams Premium users have Meeting Registration Enabled within their Meeting Policy located in the Teams Admin Centre. Whether they are part of the global org wide default policy or a custom policy this setting needs to be enabled otherwise the new experience will not work. You may also note that classic webinars (meeting registration) are still controlled solely by this setting. So, for example, if you only want Teams Premium users to be ones who can create webinars you would turn meeting registration off on the global policy, and put all Teams Premium users onto a custom meeting policy where meeting registration is enabled.

All good so far? So what’s next? Now, we may need to turn to PowerShell.
The new webinar experience is configured through PowerShell and CsTeamsEventsPolicy. Like all other policies in Teams if you were to do nothing and continue with setup then all Teams Premium users would be added to the Global Org Wide Default Policy for Teams Events Policy and this would, by default, permit the new webinar experience as well as the condition that everyone – including anonymous users – can register. For most, this is all that is required. However, you may have such cases as you want to turn webinars off for some Teams Premium Users, or that you want only some users to do internal webinars and others external. For this you would use a custom events policy. In this example, I want to allow only the Teams Premium users on the custom events policy to get the new webinar experience. I don’t want all of my users to be able to create webinars as every person in my org does not need to create them, so in addition to configuring meetings policies in the TAC (see previous screenshot), I will disable the new webinar experience in the global org wide default policy. This goes as follows:
1.) On the desktop search for Windows PowerShell and select Run as Administrator

2.) Update to the latest version using
Install-Module -Name MicrosoftTeams -Force -AllowClobber
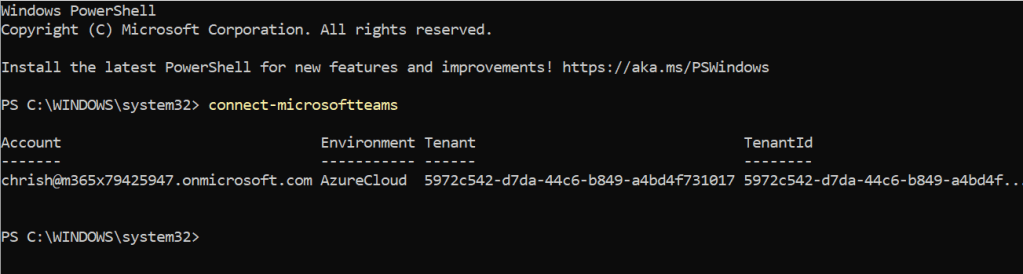
3.) Connect to Microsoft Teams using the command below. You may need to authenticate
Connect-MicrosoftTeams
4.) Run the following command to check what Policies for Teams Webinars already exist. As explained above, the Global Org Wide Default will already be in place
Get-CsTeamsEventsPolicy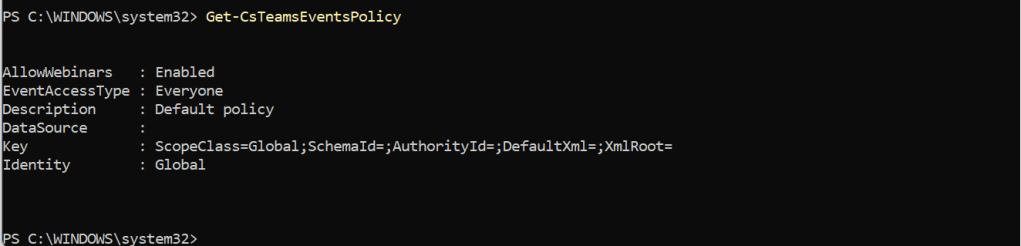
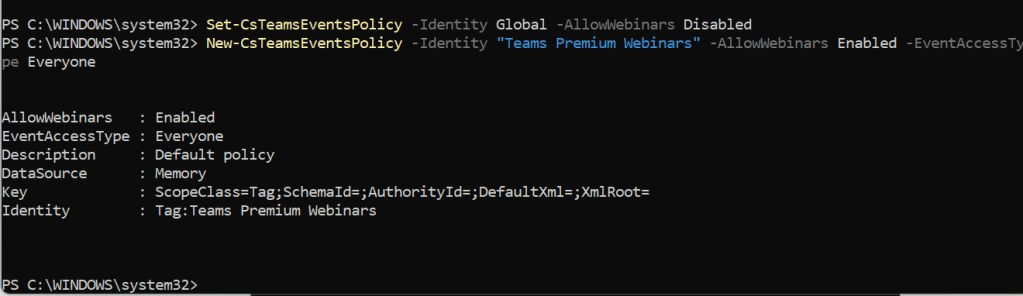
5.) Now, in this example and for my organizational needs the global policy will be disabled. I don’t want all Teams Premium users to use the new webinar experience – and a new custom events policy will be created for Teams Premium users who I want to use the new webinar experience. This will be done through two commands
Set-CsTeamsEventsPolicy -Identity Global -AllowWebinars Disabled

New-CsTeamsEventsPolicy -Identity "Teams Premium Webinars" -AllowWebinars Enabled -EventAccessType Everyone
6.) Now to assign this policy to our Teams Premium User who I want to use the new Webinar experience
Grant-CsTeamsEventsPolicy -Identity "[UPN]" -Policy "Teams Premium Webinars"
7.) Finally, check the user has the policy assigned by using
Get-CsUserPolicyAssignment -Identity "[UPN]"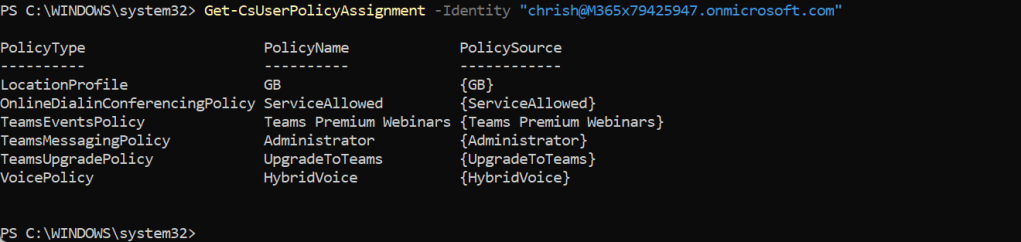
The outcome of the actions above are
- Only users with Teams Premium Licences in the custom events policy dan create webinars through the new webinar experience
- If I also aligned the meeting policies and meeting registration I can take this a step further and ensure that only users with Teams Premium and in the custom events policy are the only users able to create webinars at all in the organisation
- If I simply left everyone in the global org wide default meeting policy with meeting registration on, and everyone in the global org wide default Teams Event Policy without modifying it via PowerShell then everyone assigned Teams Premium Licencing will be able to create webinars via the new webinar experience
SETTING THE PRIVACY CONTACT AND URL IN AZURE AD
This is another optional action. In the new webinar experience, when webinars are created, the webinar registration page will display Microsoft’s Privacy statement. However, for many organisations they will want to use their own privacy statement as well. In order to do this, this needs to be set in Azure AD within Microsoft Entra
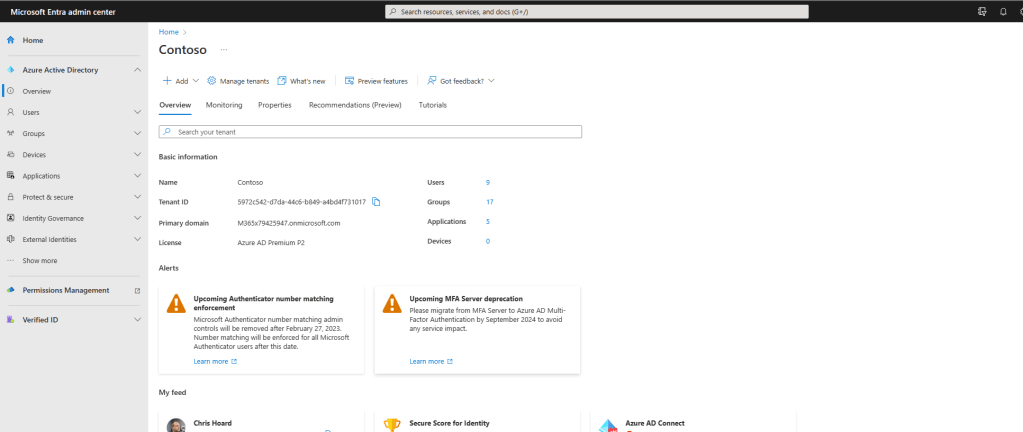
1.) In the Microsoft 365 Admin Centre, select Show All then Azure Active Directory from the left navigation
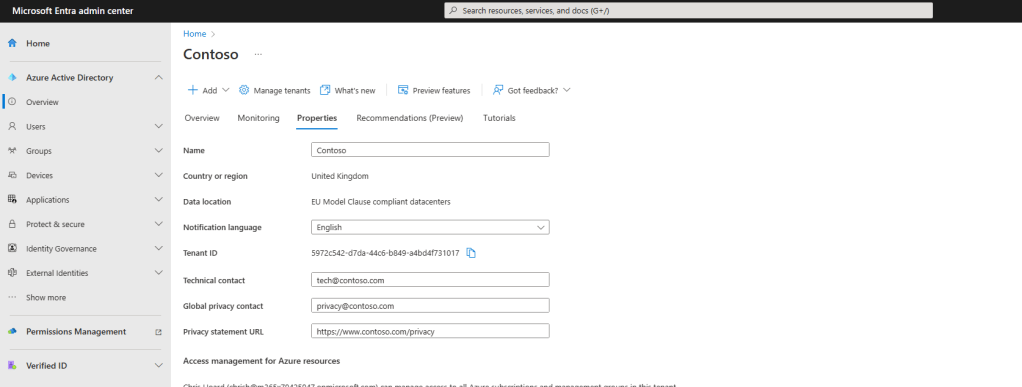
2.) The next experience will take you to Microsoft Entra. From Overview, Select the tab Properties
3.) Complete the Privacy Statement URL and then select Save. The example given here is in line with the Contoso Tenant Name
The outcome of the actions above are
- The Organization’s privacy statement will show on the webinar’s registration page alongside Microsoft’s
SETTING UP A WEBINAR
Our Teams Premium trial is setup and configured. We have enabled the new webinar experience, configured our custom event policy and we have set our privacy statement URL in Azure AD. We are now in a position to set up a webinar using the new experience
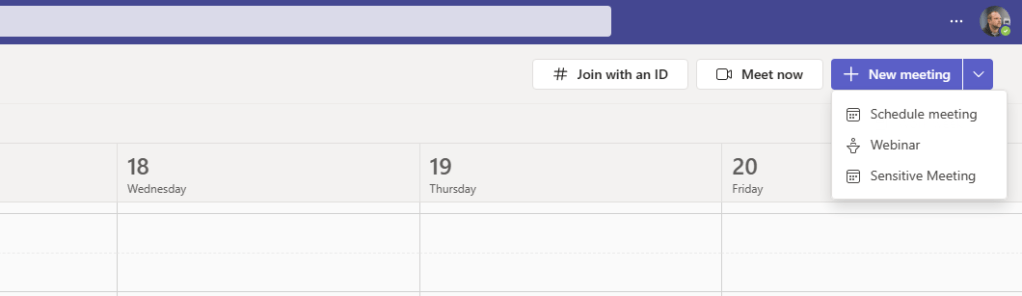
1.) In the Teams client select the Calendar app

2.) From the top right dropdown select Webinar
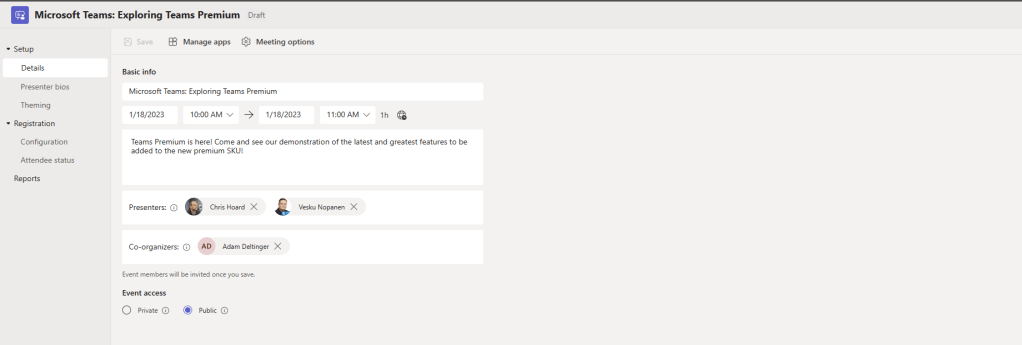
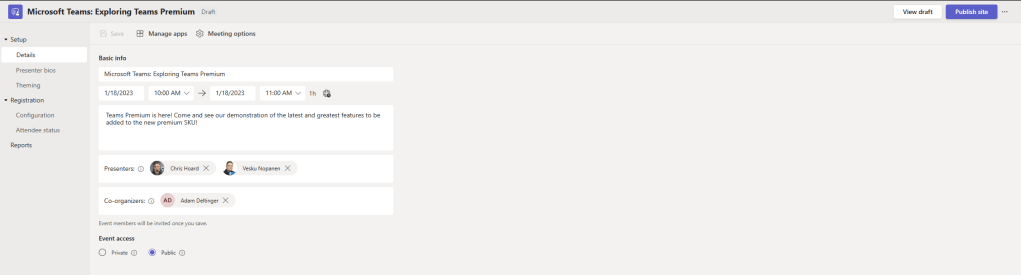
3.) The new experience will begin. Start by adding the Details of the webinar
- Title: Title of the webinar
- Date and Time: Date and time of the webinar
- Description: Description of the webinar
- Presenters: Presenters of the webinar
- Co-organisers Co-organisers of the webinar
- Event Access: Set whether private (for the organisation) or public (everyone)
Once done select Save and Send Invites

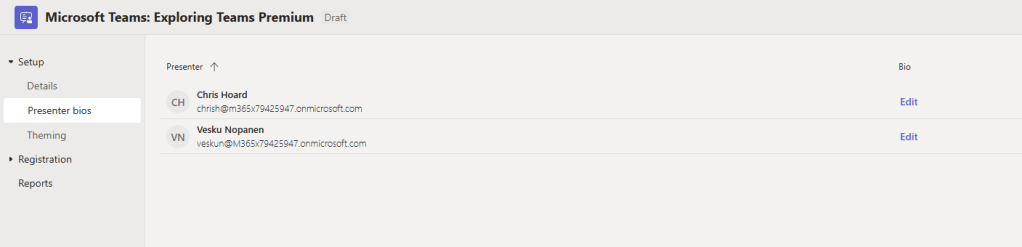
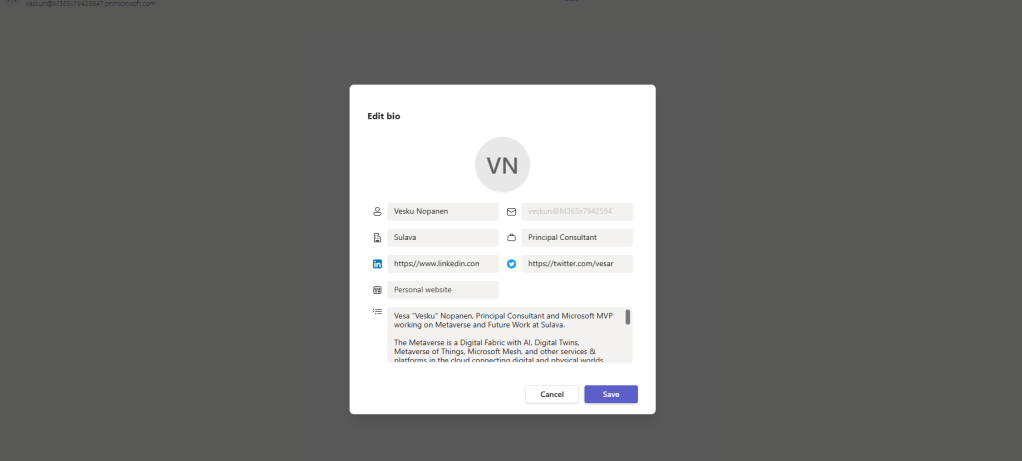
4.) Moving onto one of the new features which is Presenter Bios. Select Edit next to a presenter. Add the bio information and save. Note, the bio information will not show on this page once you have saved it. To add the presenter photo click on the circle with their initials in it and select Edit Photo, upload then Save
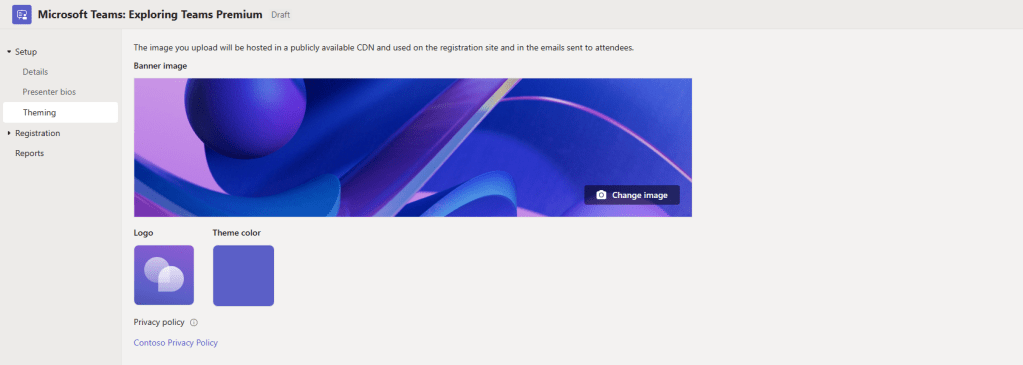
5.) Next, to configure the Theming of the Webinar. Here you can set the image on the webinar registration page, the logo, and the theme colour. Here, you will also notice the Privacy Policy as set by the Privacy Statement URL in Azure AD.
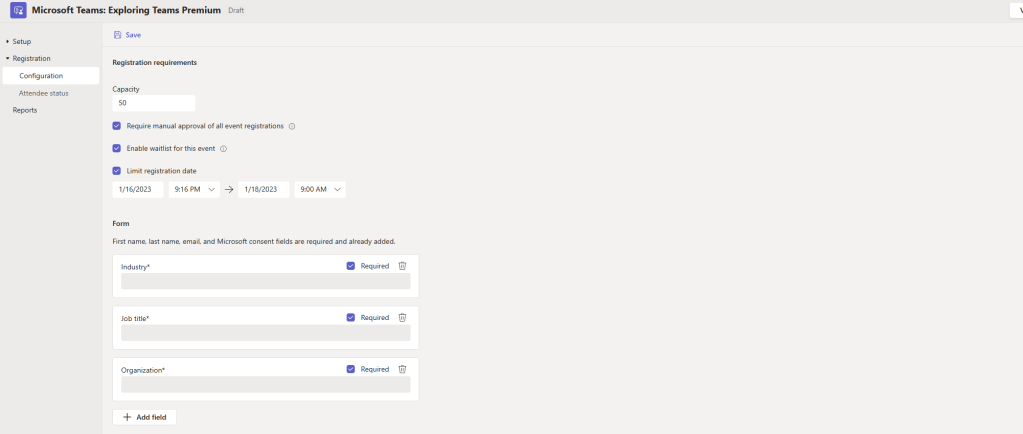
6.) Next, to Configure Registration and here we see a few more new functionalities brought in
- Capacity: Up to 1000 (here set as 50)
- Manual Approval: On or Off (here set as on because competitors could register)
- Waitlist: On of Off (here set to on)
- Limit Registration Date: Window for registration (here set to 1 hour before the webinar to stop very late registrations)
- Forms: Here you can set what you want to ask attendees and in this example I am asking for Industry, Job Title and Organisation. These can be set to mandatory or optional. You can also ask and design your own custom questions
Once done select Save
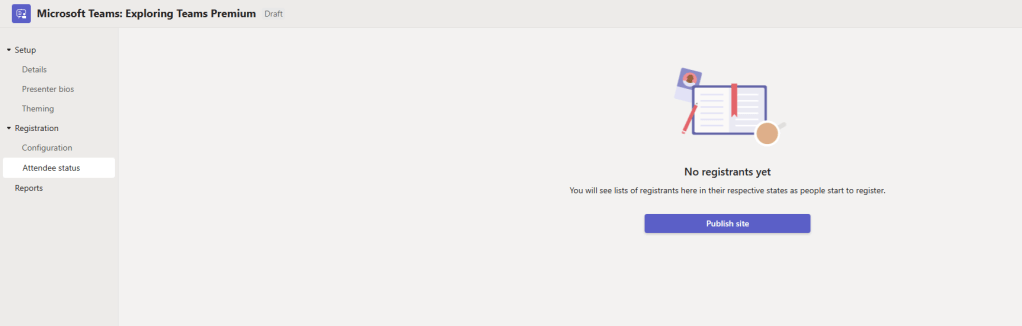
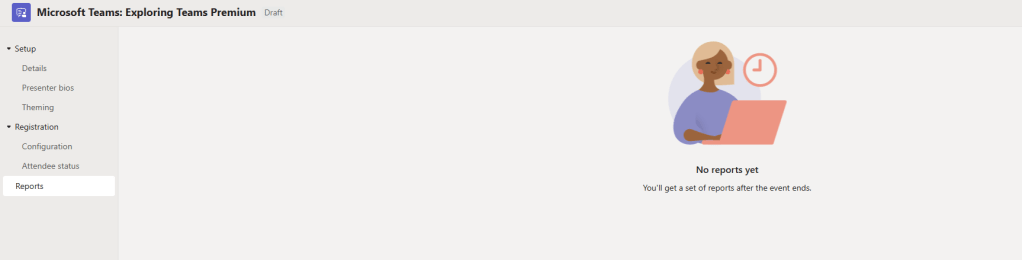
7.) Initially, Attendee status and reports are empty. Before I go ahead and publish the site (the registration page) I am going to return to the Details Section
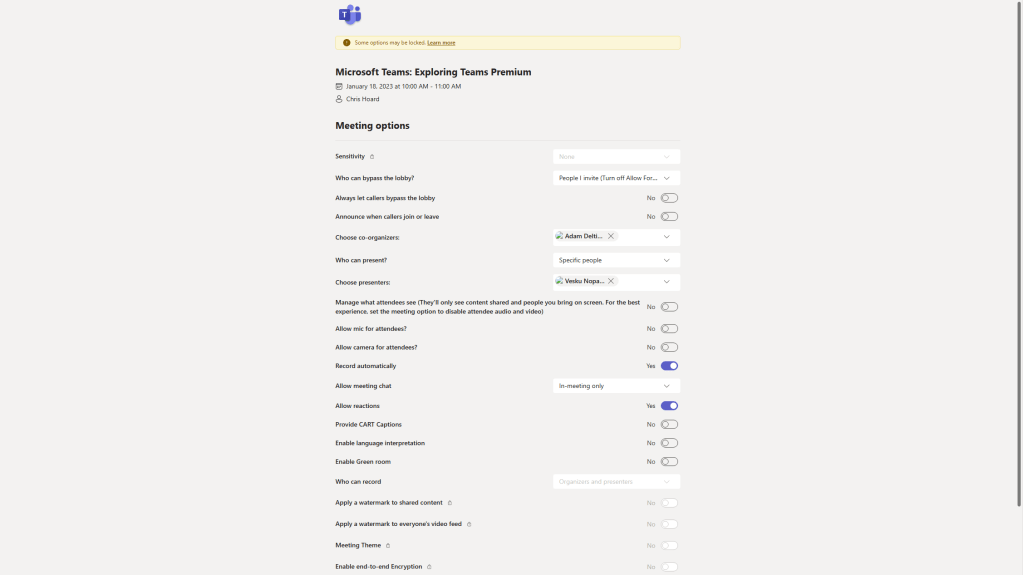
8.) Select Meeting Options
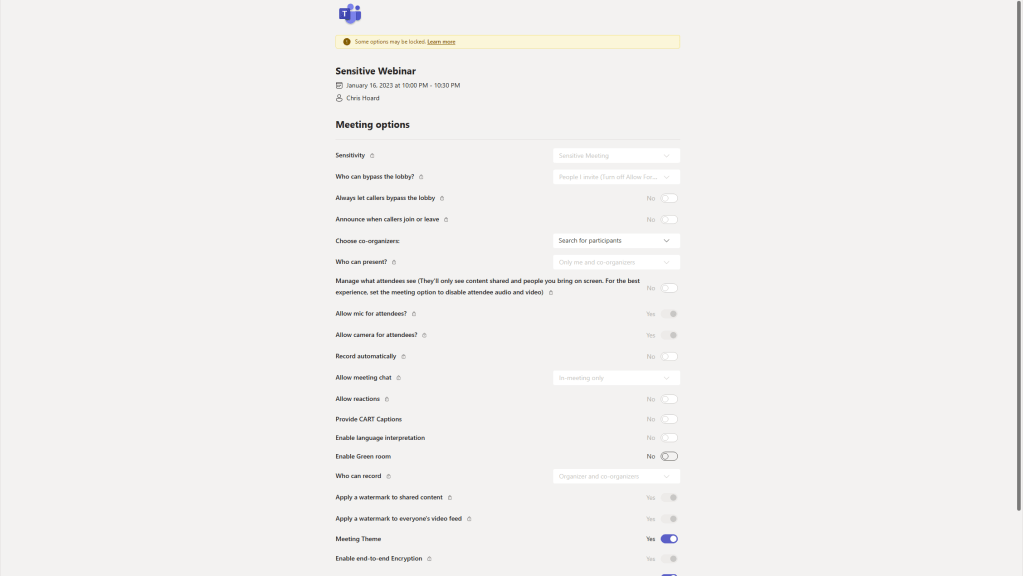
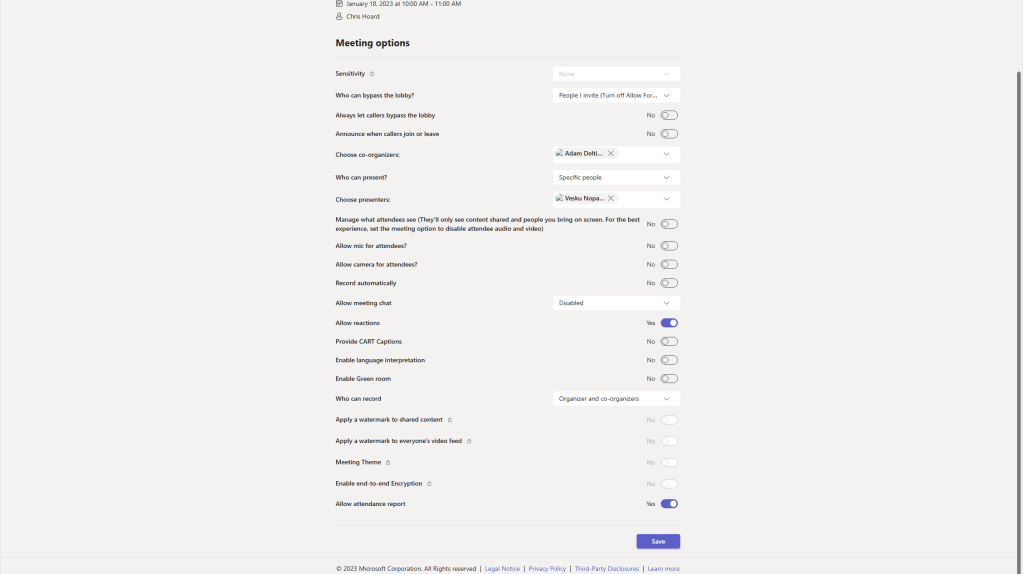
9.) At the time of writing meeting options for webinars created through the new experience have many options locked: sensitivity labels are not available/supported, nor is E2EE, nor is watermarking, nor is meeting theme. Meeting templates are not supported for webinars created through the new experience, but the fact they are locked suggests that they are controlled by some hidden template that isn’t available today through the TAC or via PowerShell. Lobby is set by default to invite and recording is set by default to automatic. In this example I will amend some of these meeting options which are available to change manually and select Save. Here are shots of the new webinar defaults out of the box and once I modified them.
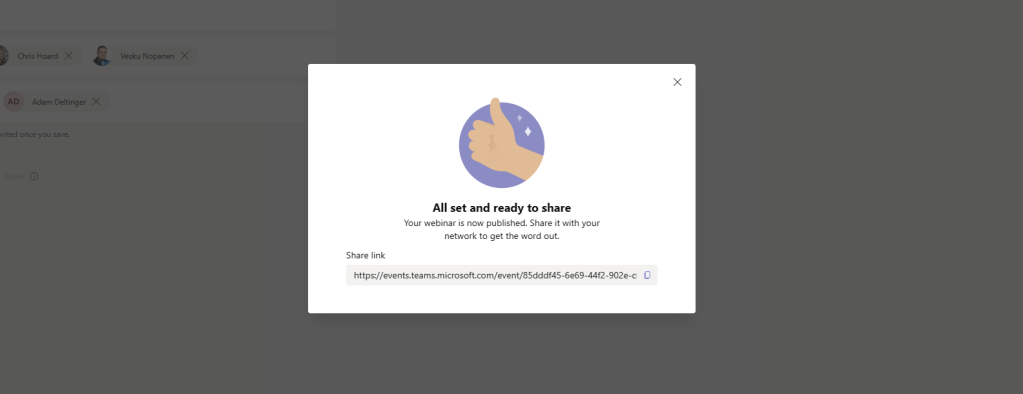
10.) Once done return to the webinar and select Publish Site at the top right
11.) Select Publish

12.) Copy the Share Link and paste in a browser
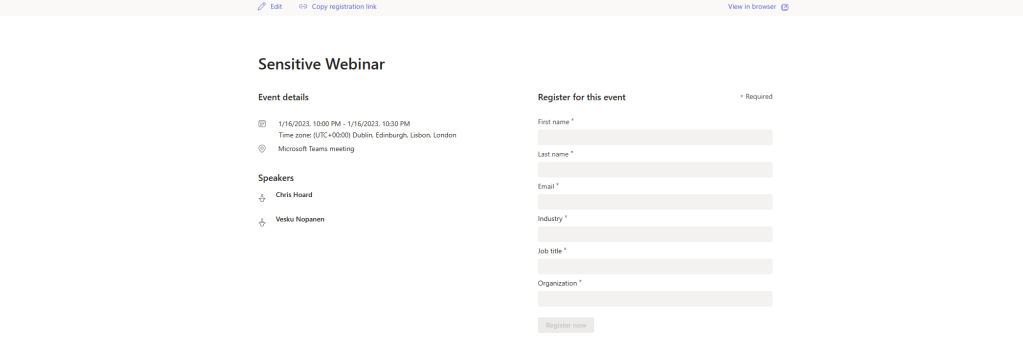
13.) Here we have our registration page good to go

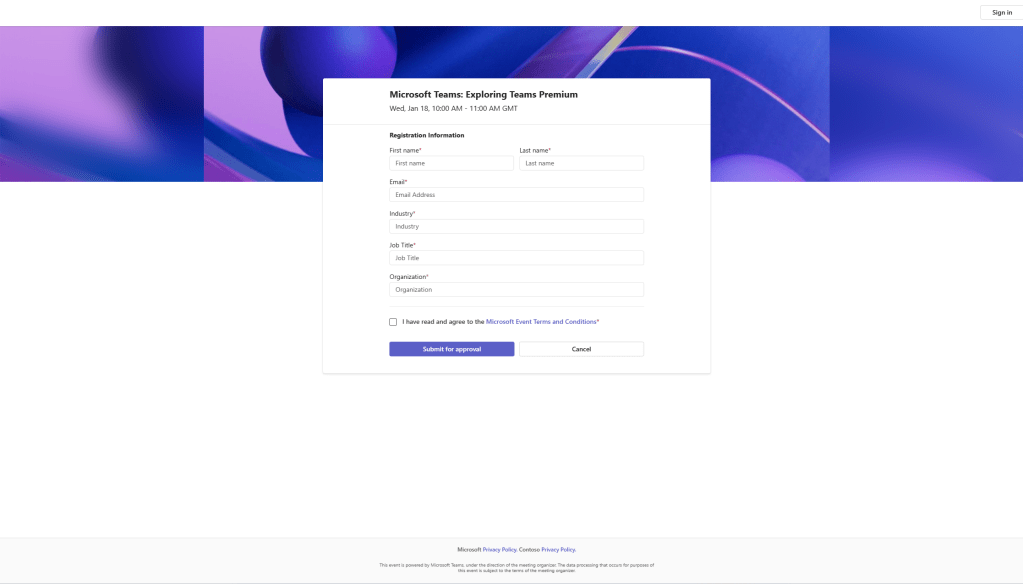
14.) Looks so good I signed up myself

15.) Because this webinar was set to manual approval I check back within the webinar page under Attendee Status, highlight the user and then select approve. That registrant moves to registered, and I can also see details on the Reports page
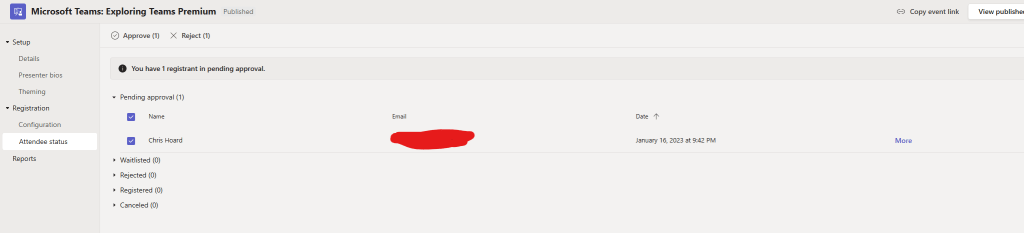

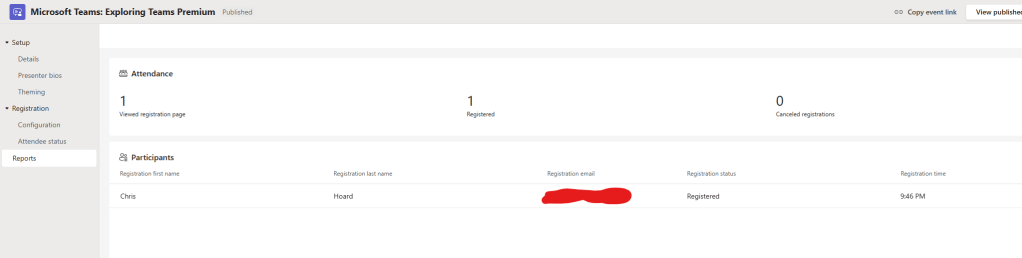
Job done. This webinar is all set up. The registration page is online and open to all. People are registering and the meeting options are configured. All easy to do and intuitive through a new setup experience, with great management features such as capacity, manual approval and limiting the registration date.
LEVERAGING ADVANCED SECURITY FEATURES THROUGH CLASSIC WEBINARS
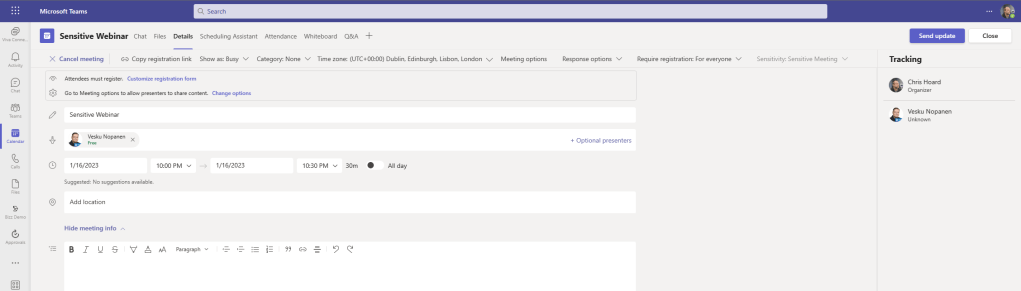
One of the downsides about the new webinar experience – at the time of writing – is that the advanced security features such as sensitivity labels, watermarking, E2EE and meeting templates are not available. I am sure that in time they will be. However, if you need to create a webinar with these security features then you can do that. This is to fallback and create a meeting with a registration page on top – in other words use the classic way to create webinars which is a.) How users without Teams Premium have to do it and b.) Is still available to Teams Premium users even with the new webinar experience
Here are some screenshots proving it with an example. I create a meeting with a custom meeting template that includes a sensitivity label, watermarking, E2EE – all the things I created in previous blogs, and then I add meeting registration on top of the meeting. That is effectively a webinar prior to the new Teams Premium webinar features. However, in this scenario whilst I get the advanced meeting security features of Teams Premium I do not get the advanced management features such as waitlist, manual approval and limiting the window to register through the new setup process.
At the moment its a trade off. I am sure the security features will be there for the new webinar experience soon.