

This blog is part of a series on Teams. For more articles, check back often
Written: 02/04/2023 | Updated: N/A
So it’s finally here. The new Teams client. Teams Modern. Or what we’ve referred to here in MVP world as Teams 2.1 over the past several months. On the day it dropped I was over in Paris speaking at MWCP23. No time for blogs. No time to even post one up on social. Of course I saw a few of my friends who did. Good old Vesku. Sara. But between us whilst I kind of expected to see and hear a lot more about it I am also unsurprised given that maybe it’s been a little diluted by the waterboarding we’ve received from Microsoft over the course of the past few weeks. The cacophony of Copilot. The real strong but still SKU based XDR integration via Microsoft Defender for Office 365 as announced at Secure. For me it is 2.1. which tops them all, and which is the most exciting of all and one which I would suggest will trigger a renaissance of sorts. Yes, l look forward to covering and deconstructing all of these things in the months ahead. But today is all about getting to the new Teams Client, and in the process forcing public preview to users from the admin end. Now being in public preview – and being only for the Windows desktop client currently 2.1 will still be more for the few as opposed to the many. And having tested it thoroughly there is still gaps between it and what we now refer to as Teams classic where we may need to move back and forth between the two from time to time, or have the classic version open in a browser. Those gaps will close in time as we head towards GA when the new experience is rolled out further and backed by an SLA. So what are we waiting for?
Let’s go
his blog will cover
- Forcing public preview in Teams via TAC
- Forcing public preview via PowerShell
- Transitioning to the New Teams Client via TAC
- Transitioning to the New Teams Client via PowerShell
Note this blog will have abridged steps which will assume some experience with Teams and a Microsoft 365 environment.
Prerequisites
- Teams Administrator (Or Global Administrator Permissions)
- Latest Teams PowerShell Module Installed (if using PowerShell)
- Teams licence for testing (usually within Microsoft/Office 365 subscription)
- Teams 2.1 is currently in public preview at the time of writing and so is only available to users who are on public preview. In the future, the new Teams will be in GA and public preview will not be a prerequisite
FORCING PUBLIC PREVIEW VIA TAC
One of the prerequisites for the new Teams client – at the time of writing – is that the user (s) need to be in public preview. This has been covered many times during this long running series, and is in this blog. However, the ability to force public preview now means that the administrator can force public preview and the user (s) do not have to switch to public preview within their own Teams client in order to participate. This could be beneficial for all participating both in terms of overhead
1.) Login to https://login.microsoftonline.com with administrator credentials
2.) Select Admin from the left app rail, or the waffle

3.) In the Microsoft 365 admin portal, select Show All from the left navigation and then select Teams
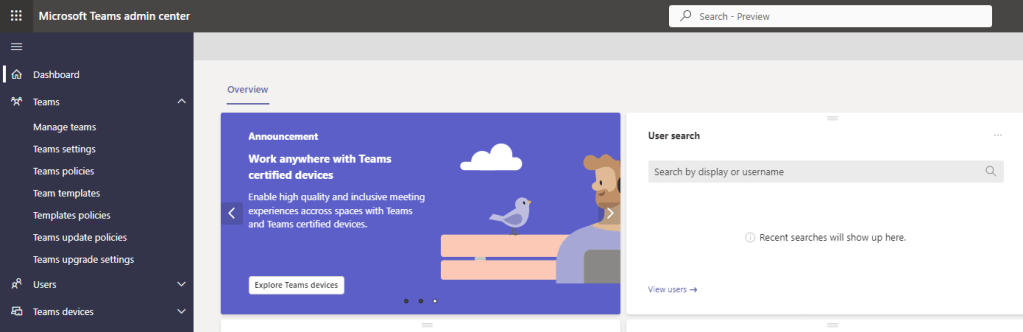
4.) In the Teams Admin Centre, select Teams and then Teams Update Policies
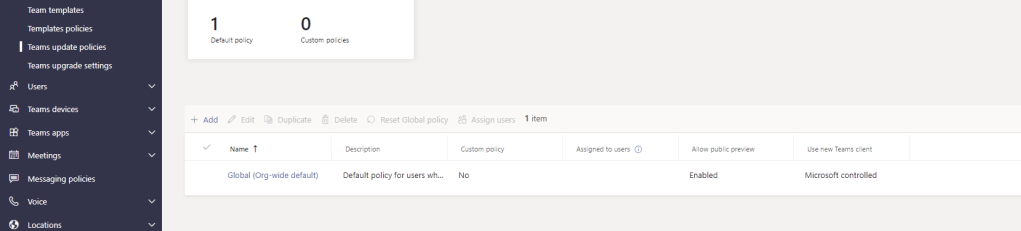
5.) Select the Update Policy (Here Global Org Wide Default)
6.) Set Allow Public Preview to Forced and then select Apply
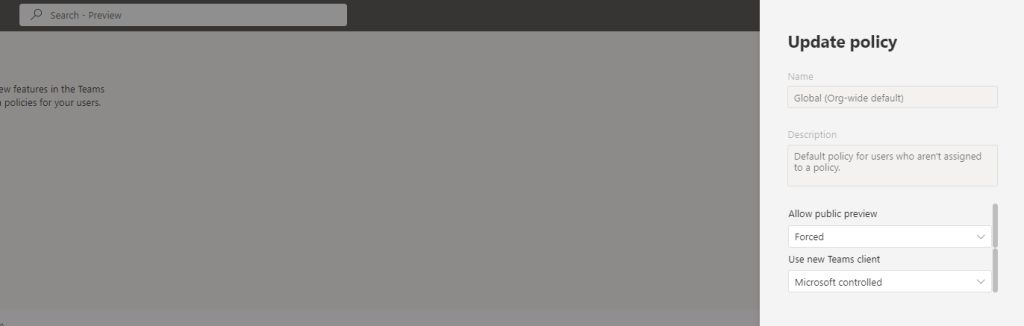
7.) Select Confirm
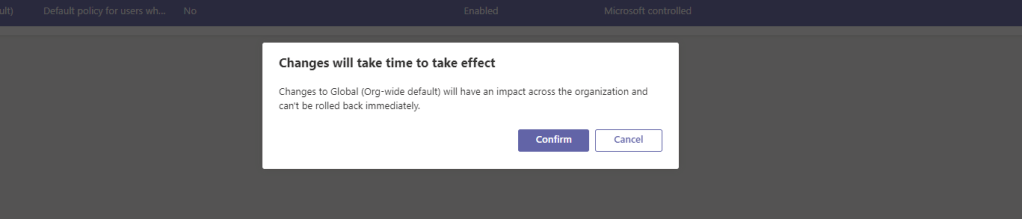
8.) The policy has now been updated. This could take a few hours to propagate

To note, that if you have custom policies that control public preview for users, these would be changed as opposed to the global org-wide default policy as shown here. Custom policies take policy precedence over the global.
FORCING PUBLIC PREVIEW VIA POWERSHELL
The above shows you how to set in the Teams Admin Centre. Should you prefer PowerShell you can also set this as follows
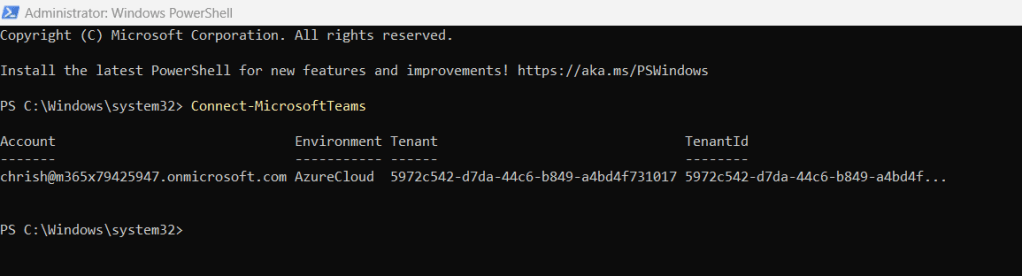
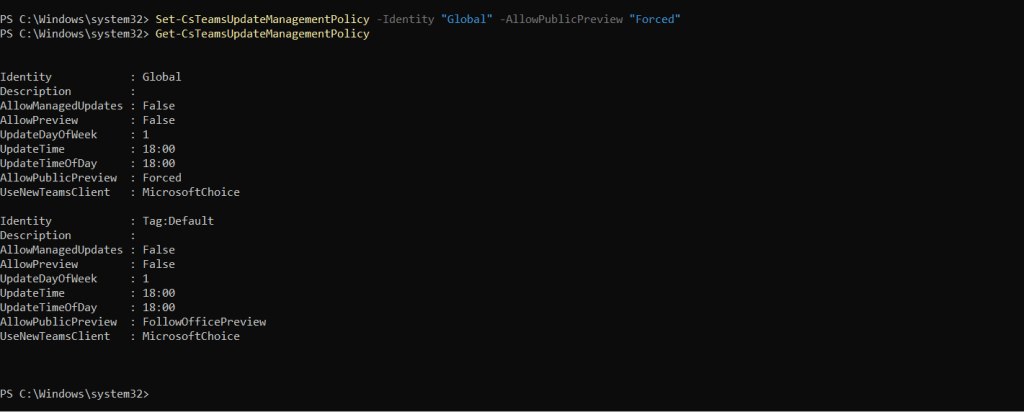
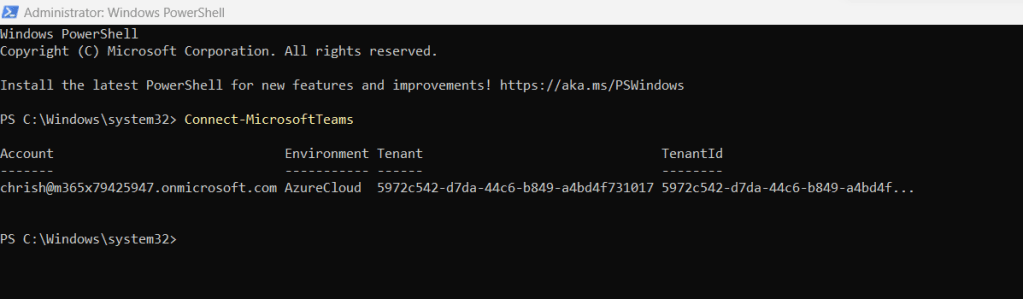
1.) Run Windows PowerShell as admin. Connect with Connect-MicrosoftTeams and authenticate as an admin
2.) You can get your Teams upgrade policies in place using
Get-CsTeamsUpdateManagementPolicy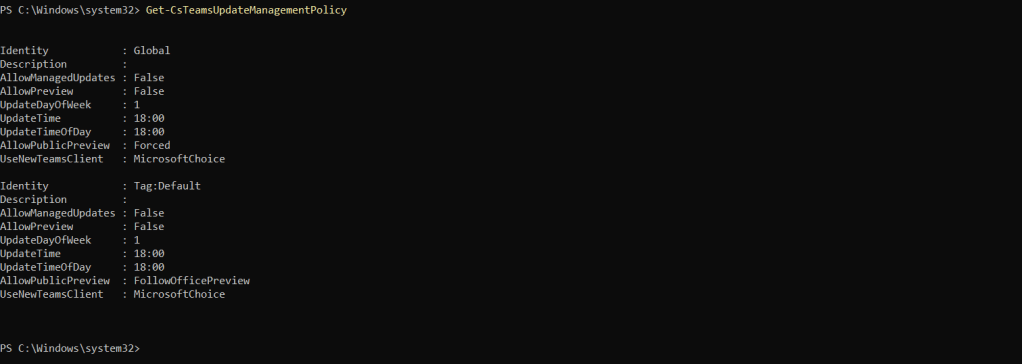
3.) Set the policy as follows
Set-CsTeamsUpdateManagementPolicy -Identity "Global" -AllowPublicPreview "Forced"
4.) You can check back with Get- to ensure that the change has taken place
To note, that if you have custom policies that control public preview for users, these would be changed as opposed to the global org-wide default policy as shown here. Custom policies take policy precedence over the global. In order to change a user from the global policy to a custom policy you can use the Grant-CsTeamsUpdateManagementPolicy command
TRANSITIONING TO THE NEW TEAMS CLIENT VIA TAC
The users who will now be going on to use the new Teams client are now in Public Preview and have met the prerequisites to do so during this period of public preview. We now need to give them the ability to switch over to the new Teams Client.
1.) In the Teams Admin Centre, select Teams and then Teams Update Policies
2.) Select the Update Policy (Here Global Org Wide Default)
3.) Set Use New Teams Client to Users Can Choose and then select Apply
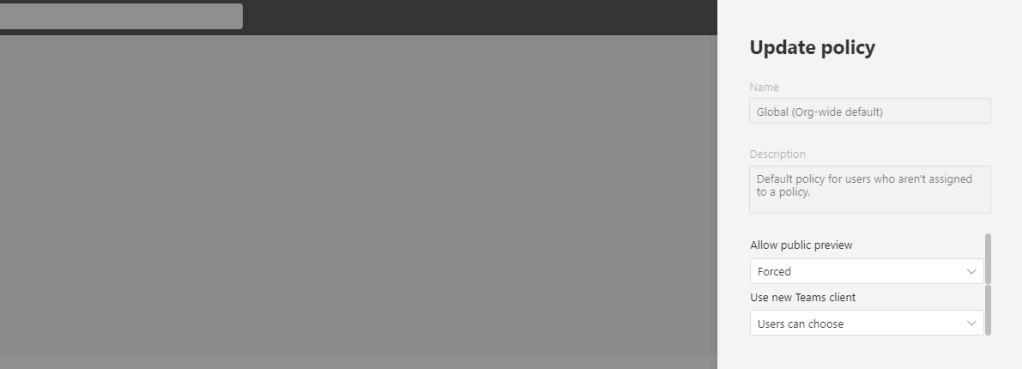
4.) Select Confirm

5.) The policy has now been updated. This could take a few hours to propagate

To note, that if you have custom policies that control public preview for users, these would be changed as opposed to the global org-wide default policy as shown here. Custom policies take policy precedence over the global.
6.) The outcome of this is that the user (s) will now see a switch in the top left of the Teams client. Select Try the New Teams

7.) Teams will now transition to the new Teams Client
7.) The user can revert to Teams classic by switching off New Teams in the top left
TRANSITIONING TO THE NEW TEAMS CLIENT VIA POWERSHELL
The only thing left to cover is how to transition to the new Teams client via PowerShell for admins who want to use the Shell. Now, users will still need to switch in the client as shown above, but the command to switch the policy in the Shell is as straightforward as it was to force public preview
1.) Run Windows PowerShell as admin. Connect with Connect-MicrosoftTeams and authenticate as an admin
2.) You can get your Teams upgrade policies in place using
Get-CsTeamsUpdateManagementPolicy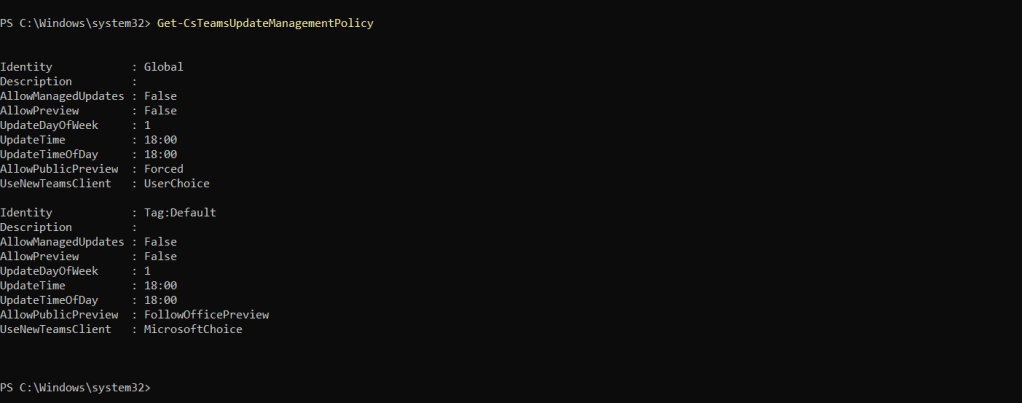
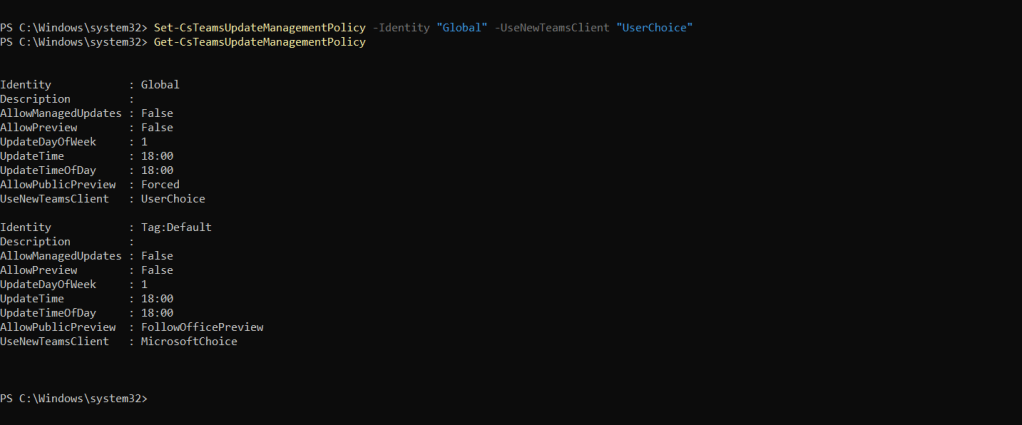
3.) Set the policy as follows
Set-CsTeamsUpdateManagementPolicy -Identity "Global" -UseNewTeamsClient "UserChoice"
4.) You can check back with Get- to ensure that the change has taken place
To note, that if you have custom policies that control public preview for users, these would be changed as opposed to the global org-wide default policy as shown here. Custom policies take policy precedence over the global. In order to change a user from the global policy to a custom policy you can use the Grant-CsTeamsUpdateManagementPolicy command
The user (s) can now go on to switch over to the new Teams client after propagation
