

This blog is part of a series on Teams. For more articles, check back often
Written: 09/07/2023 | Updated: N/A
Ok, first things first – congratulations to all the Microsoft MVP’s who were renewed this week! It was awesome to see so many friends, and so many passionate community members earn the award after their incredible efforts last year. Blogging. Speaking. Feeding back to product teams. Sharing code. Running events. Staffing events. Writing books. Even social media. You name it. Jeff Teper – CVP of Microsoft SharePoint and Microsoft Teams often refers to them at events and on social as being part of ‘The Best Community in Tech’. It’s something I would have to agree upon having known many of them now for some time. So congrats again MVP’s! And with that out the way for another year let’s move onto the blog which is a shorter one this week, and a direct follow up from a recent blog on ZAP within the new Collaborative Security for Microsoft Teams. Now only last month I recommended sticking with the security presets given that since it came out in March there didn’t appear to be a seperate ZAP policy for Teams and that the settings for Exchange Online and Teams appeared to be bound together. But in a recent message issued through the Message Centre this week, it was announced that Microsoft is ‘adding new Teams Protection cmdlets to control ZAP for Teams’. Moreso, ‘Going forward, please utilise the new cmdlets to control ZAP and quarantine policies for Microsoft Teams’. So the good news all up is that management starts becoming more granular, and you can have different ZAP policies for Exchange Online and Teams if and should you need them. On the other hand it’s likely going to raise a few questions such as – if the policies are set in PowerShell moving forward will they then surface in the Microsoft 365 Defender Portal and the security presets? And if they are set in PowerShell, will changes in the Microsoft 365 Defender Portal overwrite? Whilst this blog is an awareness piece regarding the cmdlets and serves as an addendum to the previous blog given personal testing, I would actively encourage admins to go on and test further. Being in preview and with so much evolving so quickly it’s fair to state that we don’t ultimately know the destination or the final intended behaviours and user experience as it isn’t confirmed beyond these cmdlets. Whilst I would wager that there will be a change in the GUI so that ZAP policies for Exchange Online and Teams are distinct and explicit, and that you will see the specific Teams Protection policies on quarantined items, and everything will fit flush within the presets, well you just never know, or when that’s going to land. So let’s look at something that has a load of caveats on, but at the same time will be central to how ZAP for Teams is managed moving forward.
Let’s go.
This blog will cover
- Enabling Collaboration Security for Microsoft Teams
- Testing ZAP for Teams is working
- Getting the Teams Protection Policy for ZAP for Teams
- Getting the Teams Protection Policy Rules for ZAP for Teams
- Setting the Teams Protection Policy for ZAP for Teams
- Setting the Teams Protection Policy Rules for ZAP for Teams
- Conclusion
Note this blog will have abridged steps which will assume some experience with Teams and PowerShell. All blogs will use the new Teams Desktop Client 2.1+ where possible and applicable.
Prerequisites
- Security Administrator (Defender) for Portal, Exchange Administrator (PowerShell) or Global Administrator permissions for PowerShell
- Latest Exchange Online PowerShell Module Installed
- Microsoft 365 E5, E5 Security step up, or Microsoft Defender for Office 365 Plan 2
- This functionality is in preview at the time of writing and is liable to change
ENABLING COLLABORATION SECURITY FOR MICROSOFT TEAMS (CSMT)
As a reminder of how to enable CSMT in tenants with Microsoft Defender for Office 365 (MDO) Plan 2, and which sets ZAP for Microsoft Teams as enabled by default, follow these steps. These steps will not be needed in future once out of preview, but are useful from the perspective of installing the Exchange Online PowerShell Module which will be needed to manage ZAP for Microsoft Teams moving forward
1.) On the Windows Desktop select Start then search for Windows PowerShell. Select Run as Administrator
2.) Install the Exchange Online Module with
Install-Module -Name ExchangeOnlineManagement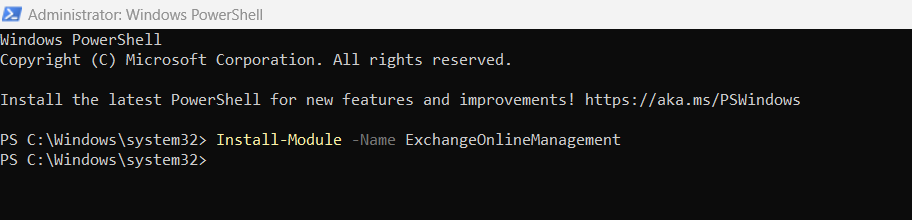
3.) Connect to Exchange Online with
Connect-ExchangeOnline -UserPrincipalName <userprincipalname>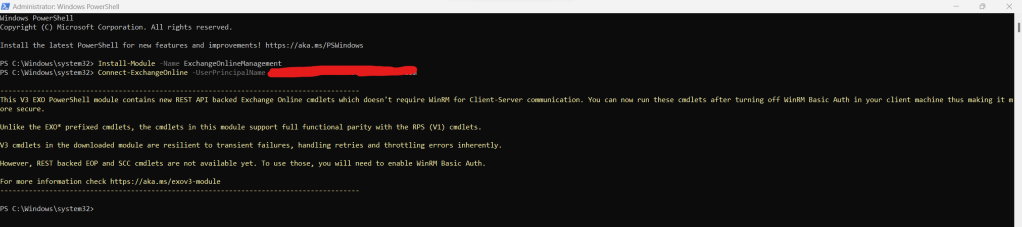
4.) Enable CSMT for onboarding with Microsoft with
Set-TeamsSecurityPreview -Enable $true
5.) You can check back on the status periodically by running
Get-TeamsSecurityPreview
TESTING ZAP FOR TEAMS IS WORKING
See the previous blog here.
GETTING THE TEAMS PROTECTION POLICY FOR ZAP FOR TEAMS
Let’s first get the Teams Protection Policy in PowerShell to review. This defines the ZAP expierence in Teams including if ZAP for Teams is enabled/disabled and the quarantine policies defined through quarantine tags. Initiate a PowerShell session via Windows PowerShell, connect to Exchange Online and authenticate using Exchange or Global Administrator credentials
1.) Run the following command
Get-TeamsProtectionPolicyAs shown, this gets the Teams Protections policy – also called ‘Teams Protection Policy’ – and shows ZAP is enabled as well as the Malware and High Confidence Phishing Quarantine Tags being AdminOnlyAccessPolicy.
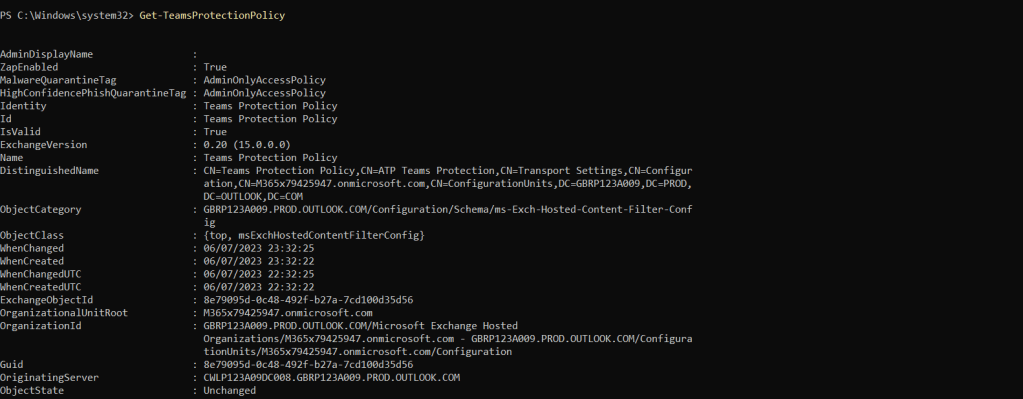
Currently, this looks to be that only policy that is permitted, since trying to create a new policy wasn’t possible even though the cmdlet New-TeamsProtectionPolicy looks to be supported

GETTING THE TEAMS PROTECTION POLICY RULES FOR ZAP FOR TEAMS
Within the Teams Protection Policy policy itself is the Teams Protection Policy rule which is where you would set rules on specific users, groups or domains, such as exceptions. It is important to note that at the time of writing only exceptions are supported.
1.) Run the following command
Get-TeamsProtectionPolicyRuleThis pulls up the policy rule which is set by precedence with 0 being the highest.

Like the Teams Protection Policy, the Teams Protection Policy Rule in place looks to be the only rule which is permitted, since trying to add a new ule wasn’t possible even though the cmdlet New-TeamsProtectionPolicyRule looks to be supported.

SETTING THE TEAMS PROTECTION POLICY FOR ZAP IN TEAMS
So far we have managed to get our Teams Protection Policy, and we have managed to get our Teams Protection Policy rule. So what if we wanted to change something within that policy? In many cases, we wouldn’t want to or need to since the default settings suffice – and this is likely the case for SMB. But what if we needed to? We would then use the set cmdlet. Now as stated previously we can’t add net new policies at the current time, so all changes are to the default Teams Protection Policy which applies to all users which are licenced – that in itself may be a reason to stick with the defaults until it gains this functionality. But assuming we are fine with making changes then the three things that we – as administrators – would be concerned with when it comes to the Teams Protection Policy are: a.) Whether it is enabled or disabled b.) The Malware quarantine tag (and hence what the quarantine behaviour is for Malware in Teams messages) and c.) The High Confidence Phishing quarantine tag (and hence what the quarantine behaviour is for High Confidence Phishing in Teams messages).
1.) Let’s disable ZAP for Teams. Run the following commaned
Set-TeamsProtectionPolicy -Identity "Teams Protection Policy" -ZAPEnabled $False
2.) This can be re-enabled with the following command
Set-TeamsProtectionPolicy -Identity "Teams Protection Policy" -ZAPEnabled $True
3.) Malware and High Confidence Phishing tags can also be modified. The default quarantine policy tags are
- AdminOnlyAccessPolicy
- DefaultFullAccessPolicy
- DefaultFullAccessWithNotificationPolicy
By default, both Malware and High Confidence Phishing quarantine tags are set to AdminOnlyAccessPolicy

Let’s change the High Confidence Phishing Tag to DefaultFullAccessPolicy with command
Set-TeamsProtectionPolicy -Identity "Teams Protection Policy" -HighConfidencePhishQuarantineTag DefaultFullAccessPolicy
Confirm it has changed with the command Get-TeamsProtectionPolicy

In terms of this reflecting in the GUI within Microsoft 365 Defender? I would expect this to – in time – reflect in the flyout of the quarantined item under Review with a Policy Type and Policy Name being Teams Protection Policy and Teams Protection Policy respectfully. This behaviour has yet to be confirmed by Microsoft.

Finally, I would assume that this should work with custom quarantine policies where custom quarantine name tags exist and can be used with the set cmdlet – but this will need further testing to ratify.
SETTING THE TEAMS PROTECTION POLICY RULE FOR ZAP IN TEAMS
Now that the policy has been configured, we can also set the rule which – as previously specified – operates on precedence. Currently, this cmdlet – Set-TeamsProtectionPolicyRule is limited. On the one hand, it is not supported in terms of being able to add net new rules meaning that the default Teams Protection Policy Rule at priority zero (0) is the only one that can be used or modified. On the other hand, only exceptions are currently supported. Let’s try this out.
1.) Let’s start by using get to get the Teams Protection Policy Rule
Get-TeamsProtectionPolicyRule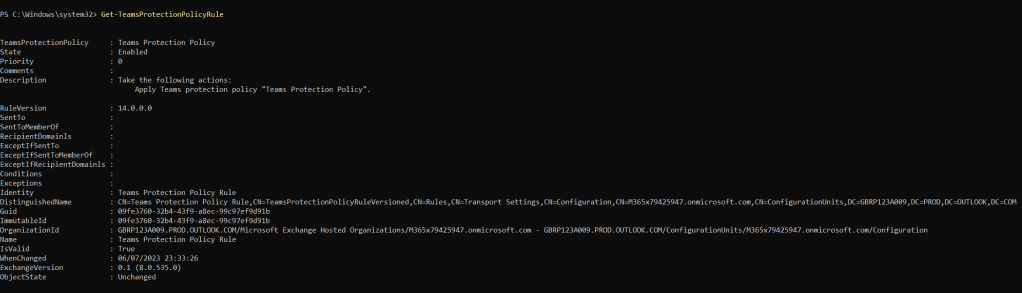
2.) It has no exceptions initially. But if I use the following command then I can set an exception for the user ‘Adam Deltinger’
Set-TeamsProtectionPolicyRule -Identity "Teams Protection Policy Rule" -ExceptIfSentTo "adamd@m365x79425947.onmicrosoft.com"
3.) Use get again to check that the user had been added, which it has

4.) The user can be removed by using the command
Set-TeamsProtectionPolicyRule -Identity "Teams Protection Policy Rule" -ExceptIfSentTo $Null
In the case where there are multiple users to add to an exception, use comma’s and multiple addresses set in apostrophes, as in
Set-TeamsProtectionPolicyRule -Identity "Teams Protection Policy Rule" -ExceptIfSentTo "adamd@m365x79425947.onmicrosoft.com","veskun@m365x79425947.onmicrosoft.com"
5.) Finally if using groups or domains, remember to use the appropriate cmdlet’s for them. To use groups, use -ExceptIfSentToMemberOf and to use domains, use -ExceptIfRecipientDomainIs. A command to make an exception for the domain these users use is
Set-TeamsProtectionPolicyRule -Identity "Teams Protection Policy Rule" -ExceptIfRecipientDomainIs "m365x79425947.onmicrosoft.com"CONCLUSION
Our job here is done. In terms of a first look into the new cmdlets and commands which will be used to manage ZAP in Teams moving forward I think it has done the job and illustrated that there will be a more granular level of administration that clearly distiguishes management of ZAP in Teams from Management of ZAP in Exchange Online. This makes sense given that ZAP management should not neccessarily be a one size fits all policy across services and whilst many will not modify the default settings, an administrator should be able to if needed and they have good reason to do so. However, being recently released there is a lot of room for this to develop. One, this needs to be configurable in the Microsoft 365 Defender Portal because not every admin is adept at, or wants to use PowerShell – but more importantly these need to show in the portal for visiability where functionality needs to be consistent across GUI and CLI. I’ll assume this will occur over time like most admin functionality. Secondly, given this testing one would assume that the ability to add net new Teams Protection Policies and Rules will be possible over time given that New- commands are recognised and precedence is built in. I hope this is the case because whilst most organisations will not deviate from the default policy and the default rule at priority zero, it is always good to have that level of flexibility if it is truly needed.
So well done team, a good start and progression of the ZAP for Teams functionality. And much more to look forward to! For all the admins who read this, this has been an awareness piece and you’ll want to do your own testing. Being a preview feature, and with the rapid state of development in Microsoft Defender this could very well be more complete by the time you get around to it, or even light it up.
