

This blog is part of a series on Teams. For more articles, check back often
Written: 02/01/2022 | Updated: N/A
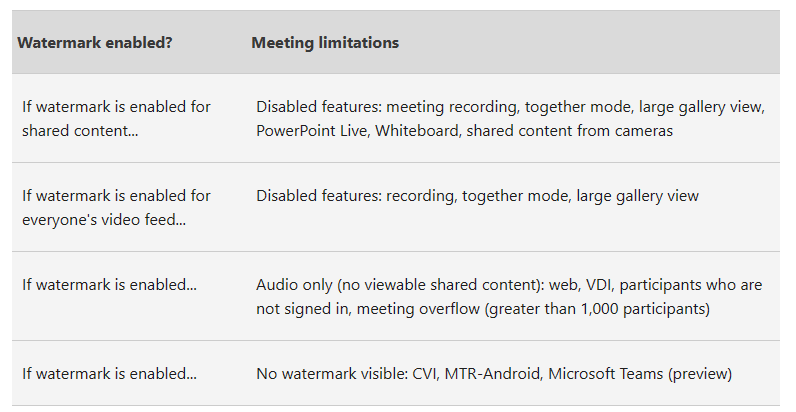
Meetings, like files, can contain sensitive information. Whether sharing video, or sharing screen content such as a PowerPoint presentation, the meeting organiser may wish to actively discourage data leakage, counterfeiting or plagiarism. Think of the following scenario: an attendee screenshots a PowerPoint slide whose intent is to leak that onto others even knowing that the content has been explicitly defined by the presenter as being under NDA. This is where watermarking fits in. A watermark, by definition, is an identifying image or pattern that appears as various shades of lightness/darkness when viewed by transmitted light. The process originated over 800 years ago and has been used for paper, stamps and currencies. In IT, it is defined as a piece of transparent text, image or logo, applied to an item, such as a file, an image, or a video. In Microsoft 365 watermarking can be used in Office apps, such as Word (via the Design Tab) or can be automatically applied to files via Sensitivity Labels. With the coming of Teams Premium, watermarking can now be used in Teams meetings for both video and shared content, and can be used in alignment with other Teams Premium functionalities such as Meeting Templates and Meeting Sensitivity Labels. This is awesome, and these functionalities will be explored in forthcoming blogs. But at the time of writing, there are some rules around watermarking which I would advise need to be known before going ahead and using it with confidence. This is a bit like when End to End Encryption (EE2E) was released. Firstly: if using watermarking, you cannot record. Not manually, not automatically whether that is sharing video or content. Secondly, it knocks out other meeting functionalities such as Together Mode, Large Gallery, PowerPoint Live and Content from Camera. This depends on what you watermark. Third, if watermarking is used, then it would be an audio experience only for web, VDI (so on AVD/Win 365) as well as anonymous and overflow participants and again this depends on the watermarking. Last – and the big one, the watermark itself displays the the email address of the meeting participant, not the presenter. I have already been asked why this is – and to be fair it makes a lot of sense. If somebody leaks your content, then it’s not going to really identify who did that by having your details on it. If some screenshot gets out into the wild then it’ll have their details stamped all over it, or it’s going to cause them an incredible amount of difficulty to try and gloss over the watermarks. I am quite excited to try this out
Let’s go
This blog will cover
- Getting Teams Premium Trial
- Configuring Watermarking in Teams Admin Centre
- Configuring Watermarking in Meeting Options
- Experience of Sharing Video
- Experience of Sharing Content
- FAQ
Note: this blog may have some abridged steps which will assume some experience with Teams. This blog is using a Ring 4 tenant with GA functionality. Teams Premium will be a trial sign up, but will soon be orderable via Microsoft 365 Portal or your CSP Partner
Prerequisites
- Global Admin for trial sign up. Global Admin or Teams Admin for tenant configuration
- Microsoft 365 Licence for Teams for testing
- Teams Premium Trial Licence for users
- Ensure Teams Client is up to date (version tested on
GETTING TEAMS PREMIUM TRIAL
Ok, so the tenant I am using is not using Teams Premium so I will need a Teams Premium trial.
1.) Go to https://aka.ms/tpdlnk and login with the global admin credentials

2.) Select Start Free Trial. Currently in this trial only 1 licence is permitted

3.) Select Try Now

4.) Select Continue

5.) Wait a few minutes and the licence will be provisioned to the tenant. In the Microsoft 365 Admin Centre select Users then Active Users

6.) Select the User to assign the Teams Premium Licence to, then Manage Product Licences. Tick Microsoft Teams Premium and then Save Changes. All set up and ready to go.

CONFIGURING WATERMARKING IN THE TEAMS ADMIN CENTRE
Ok. Now the licence is assigned to the user this should enable the configuration in the Teams Admin Centre to configuring the watermarking.
1.) In the Microsoft 365 Admin Centre, select Show All then Teams from the left navigation

2.) In the Teams Admin Centre select Meetings then Meeting Policies
3.) At this point you could modify the Global (Org Wide Default) policy, or a custom policy. This example will modify the global. Select Global (Org Wide Default)
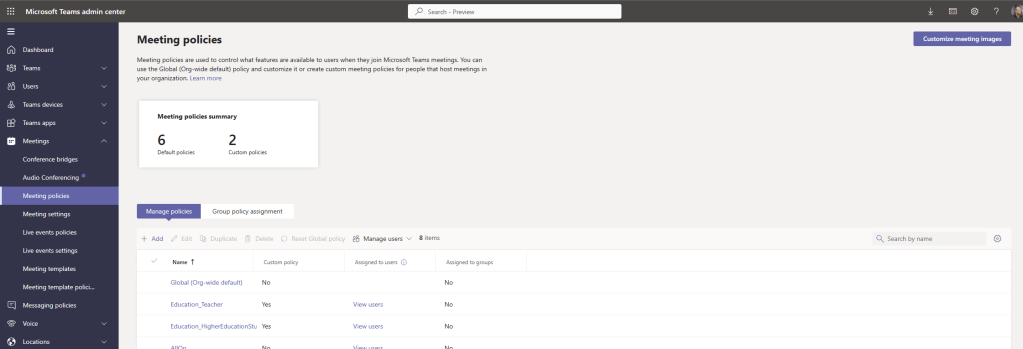
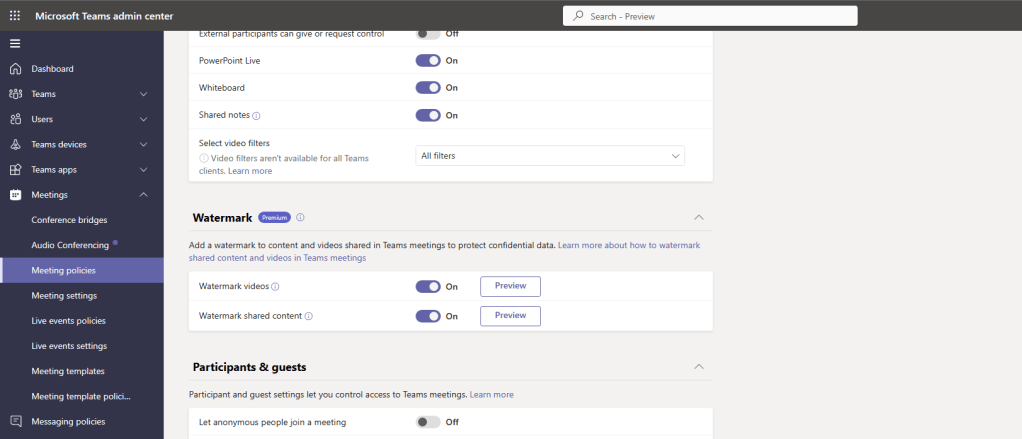
4.) Scroll down to the section Watermark and swipe the following to on
- Watermark Videos (this will watermark the video stream of the presenter)
- Watermark Shared Content (this will watermark shared content, such as the screen, window, etc)
Once done, select Save. The policy is now configured and will need time for propagation
CONFIGURING WATERMARKING IN MEETING OPTIONS
Now that Watermarking has been configured in the Teams Admin Centre and there has been some propagation time (I waited 2 hours), let’s configure a meeting to include watermarking
1.) Create the meeting as usual and once created, open it back up and select Meeting Options
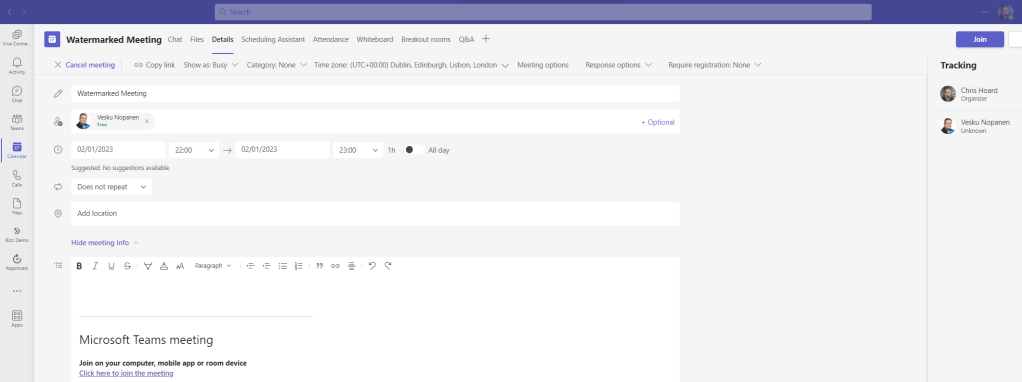
2.) In the meeting options, swipe the two watermarking options to on and select Save. You will notice that recording becomes greyed out since that is not permitted with Watermarking

Job done. All ready to go 🙂
EXPERIENCE OF SHARING VIDEO
Once in the meeting here is the experience of Sharing Video for the attendee.
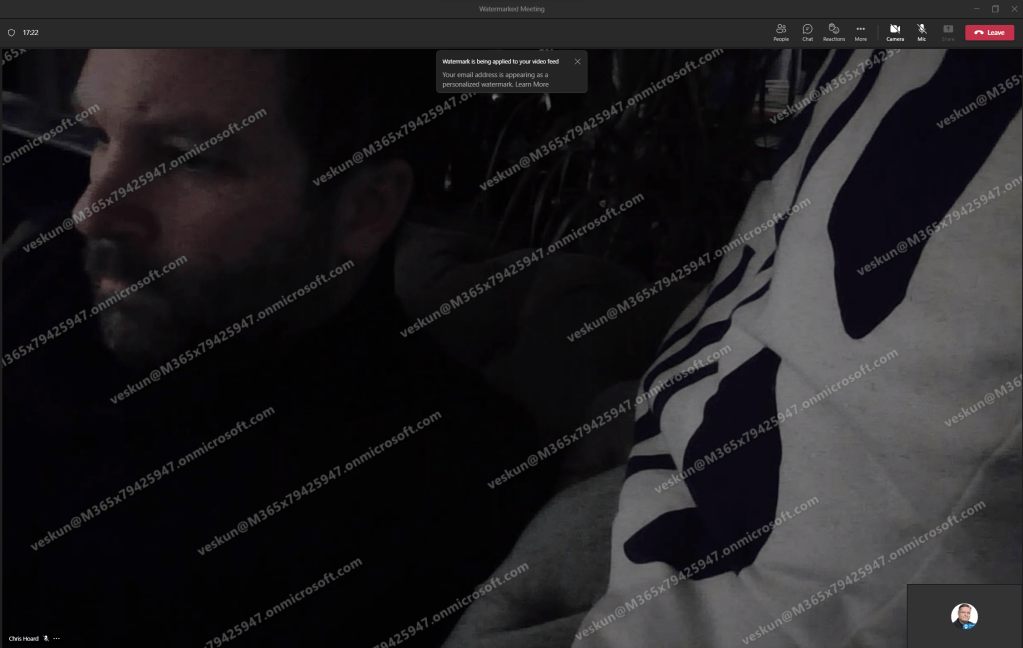
It supports custom backgrounds

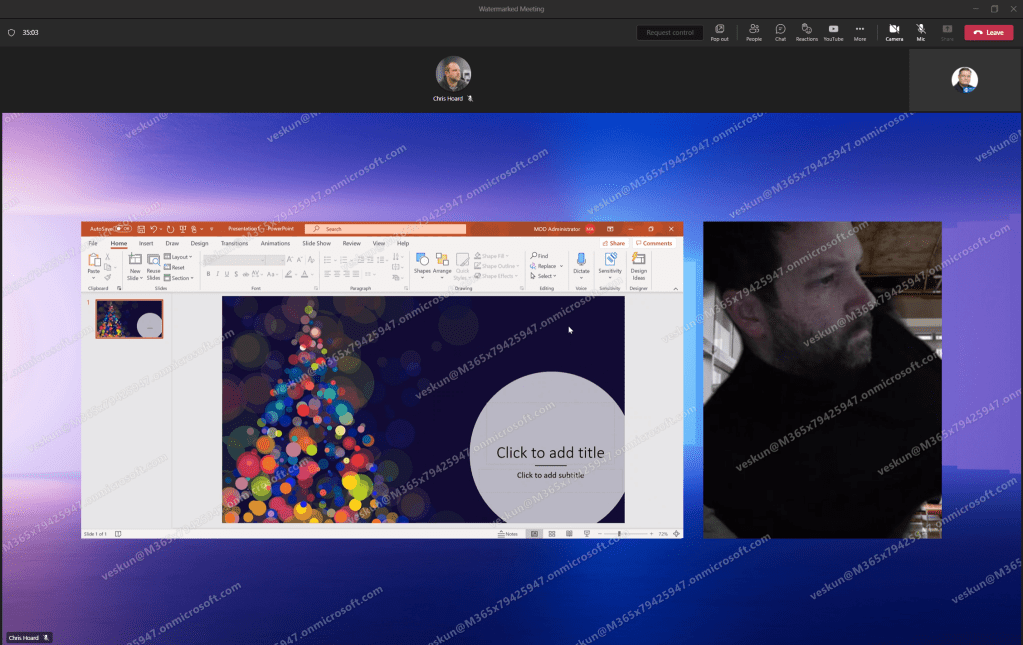
EXPERIENCE OF SHARING CONTENT
Once in the meeting here is the experience of the presenter Sharing Content for the attendee. This is the presenter sharing a Window of a PowerPoint Presentation.
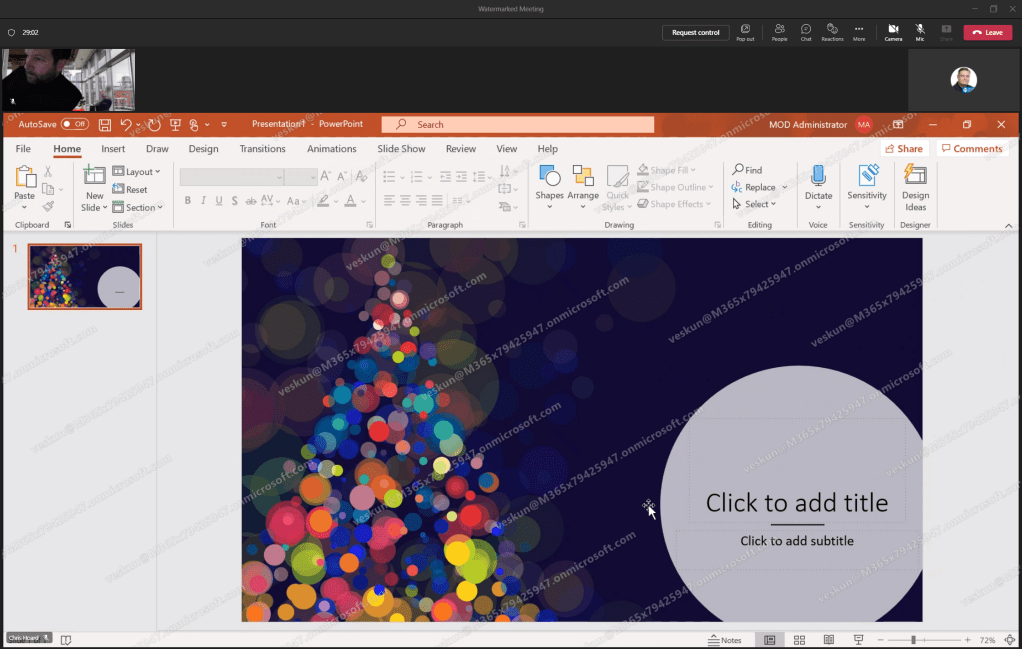
Watermarking covers Screen and Window and also covers Presenter Modes when Sharing such as this side by side
FAQ
Q.) Do attendees need Teams Premium Licences to use Watermarking?
A.) No, only the organiser of the meeting who sets the Teams Settings. This means the only people who ultimately need Teams Premium for Watermarking functionality are those who share sensitive content in meetings, not every user in the organisation
Q.) Is there an easy reference guide to what is not permitted when Watermarking?
A.) Yes, at the time of writing this should cover it
Q.) Can I do this in PowerShell?
A.) In the future, yes, but at the time of writing it looks like it’s not supported with Teams Version module 4.9.1. The future commands will be based around the Set-CsTeamMeetingPolicy cmdlet, such as
Set-CsTeamsMeetingPolicy -Identity Global -AllowWatermarkForCameraVideo $True

Set-CsTeamsMeetingPolicy -Identity Global -AllowWatermarkForScreenSharing $True
Q.) Can I enable Watermarking in the meeting?
A.) No, it needs to be set before the meeting starts in the meeting options
Q.) How does this relate to Teams Meeting Templates and Sensitivity Labels
A.) Watermarking can be applied to specific meetings using Teams Meeting Templates, or Sensitivity Labels, which are also features in the Teams Premium Licence. These will be covered in blogs following this one 🙂

2 thoughts on “Teams Real Simple with Pictures: Watermarking with Teams Premium”
Comments are closed.