

This blog is part of a series on Teams. For more articles, check back often.
Written: 21/07/2019 | Updated: N/A
A set of common links (I.e. https://teams.microsoft.com/start) can be important for a team. Whether to access training, vendor sites, or even files within a channel it democratizes access to information, makes information more readily available and brings it to the users instead of them having to search for it. Yet with Teams there are different ways to create sets of links and each way has it’s own pro’s and con’s. At the time of writing there is no single accepted way which has been recognized by the Tech Community as the best – so its a case of choosing which one is right for the Team. This will show you four potential methods to create a set of links.
WHY WOULD WE DO IT?
- To democratize access to information for the Team
- To make information more readily available
- To save time and bring the information to the Team instead of having to search
PREREQUISITES
The following is required
Method 1: Teams Licence/SharePoint Licence
Method 2: Teams Licence/SharePoint Licence
Method 3: Teams Licence/Website (I.e. WordPress)
Method 4: Teams Licence/SharePoint Licence/Office Web App Licence
Usually, Teams, SharePoint and Office Web Apps licences will come within an Office 365 licence. Full Control permissions on a SharePoint List is needed for Option 2. Owner permissions in the Team is needed for Option 3 and 4 if permissions have been locked down to restrict the creation of Tabs. Full Control Permissions on the OneNote File is also needed for Option 4.
HOW – METHOD 1 – THE WIKI
1.) In Microsoft Teams go to the Team, select the Channel and then select Wiki

2.) In the Wiki create a raw set of links, or create tables to house your links
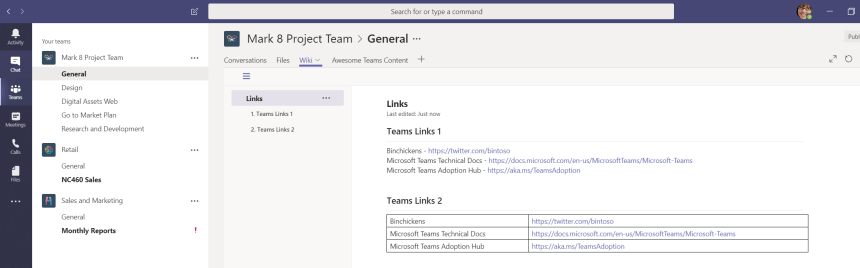
The upside of this method is that is very easy to create and section links and it is very easy to add, delete or amend. Internal files work with this method as does Mobile. The downsides are that the performance of the Wiki can be sporadic whilst editing (white screening prompting reload of the Teams Client), it can’t be locked down even when permissions are set in SharePoint and it can be easily deleted by users where restore (covered here) isn’t intuitive. Several improvements for the Wiki have been asked for at the Teams Uservoice here including the ability to perform a full Wiki search
HOW – METHOD 2 – SHAREPOINT LIST
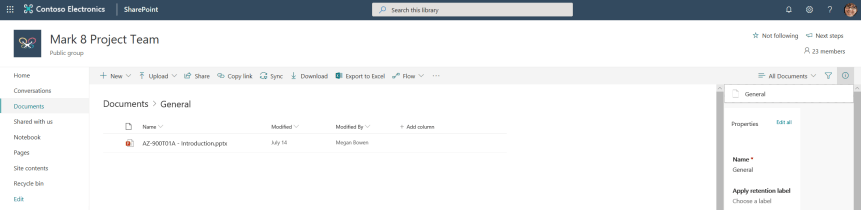
1.) In Microsoft Teams go the the Team, select the Channel, select Files and then Open in SharePoint. This should direct to the underlying SharePoint Site of the Team

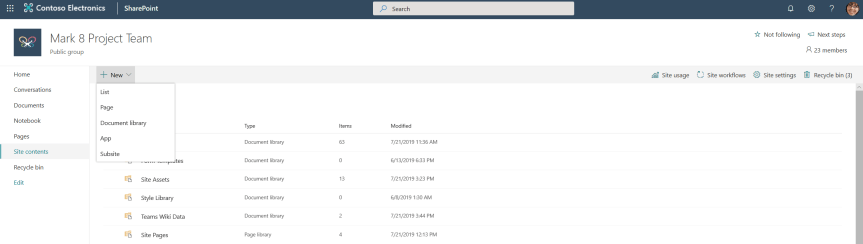
2.) Select Site Contents,then New, then List
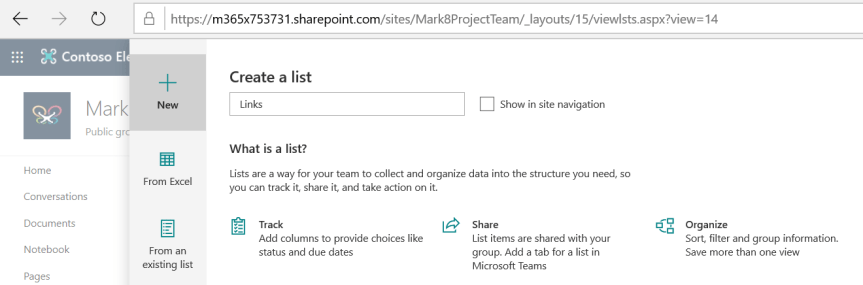
3.) Enter the name of the Links list (here shown as Links) and select create
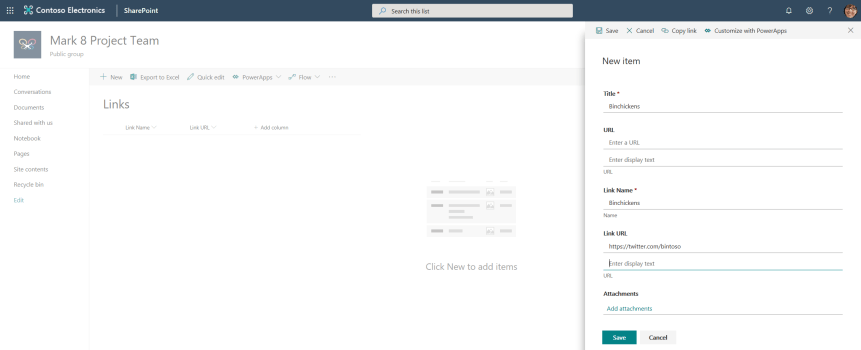
4.) In the list, Select add column and add Hyperlink
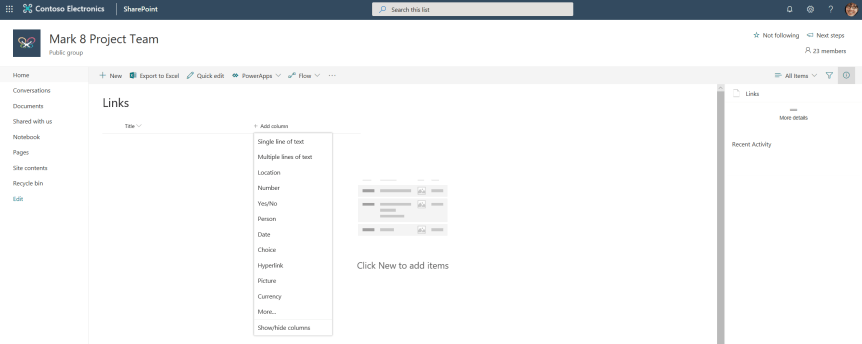
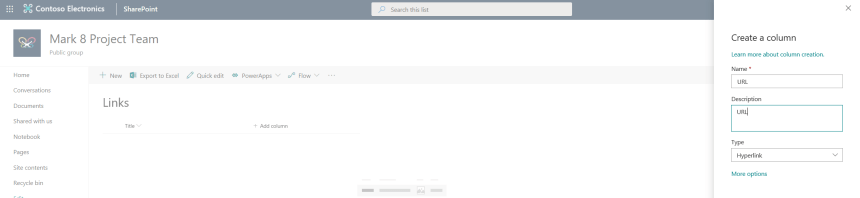
5.) Add the details of the Hyperlink column. This will be where the user is directed to when clicking the link. This should be called something like Link URL or simply URL. Once done select Save
6.) Now select Add column and add Single Line of Text
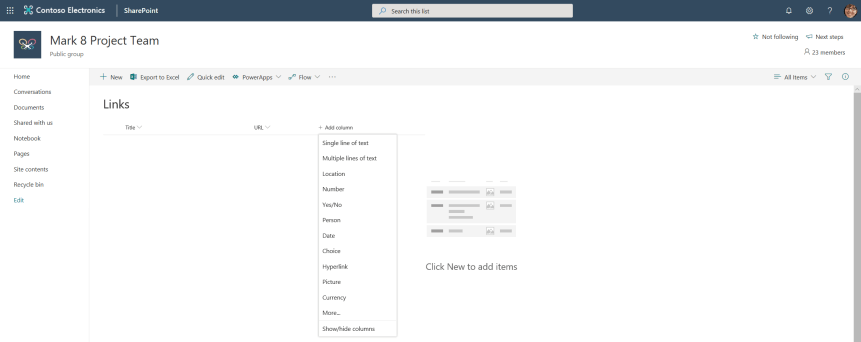
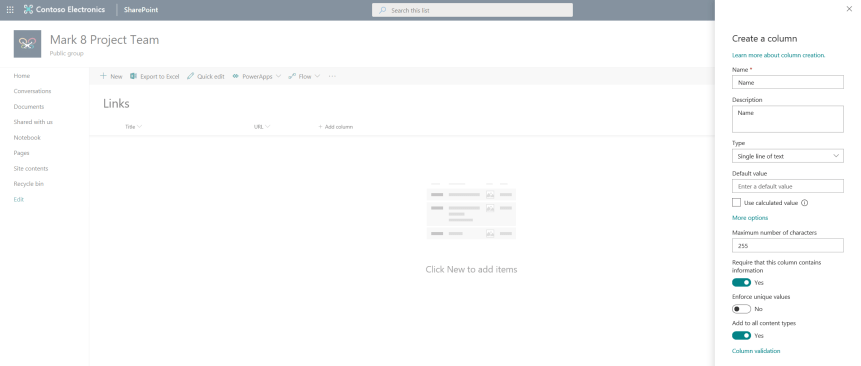
7.) Add the details of the Single Line of Text column. This is the name of the site the link is directing to and should be called something like Link Name or simply Name. It is recommended to have the max 255 characters and be a required field. Once done, select Save

8.) Now having two columns for Link URL (URL) and Link Name (Name) reorder the columns so that Link Name precedes Link URL – this can be done simply by dragging and dropping the column headings. Once done, select Edit Current View under All Items
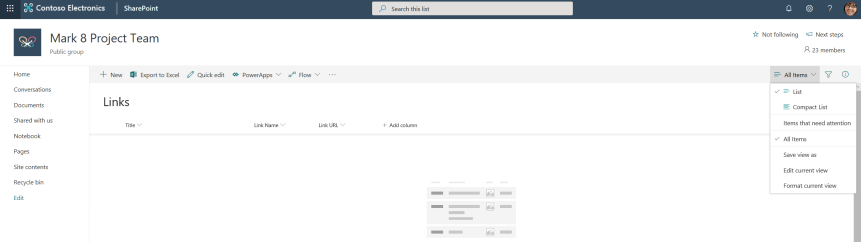
9.) Set the view to only display List Name (Name) and List (URL) in a position of 1 and 2 respectively. Sort by Link Name (Name) and set a high item limit (here set as 500). Once done select Save


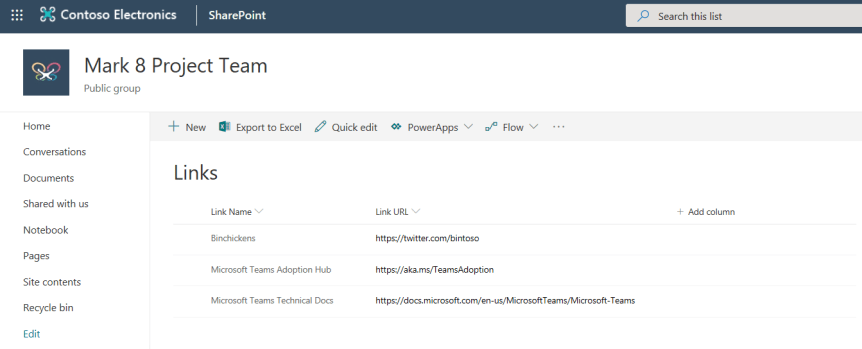
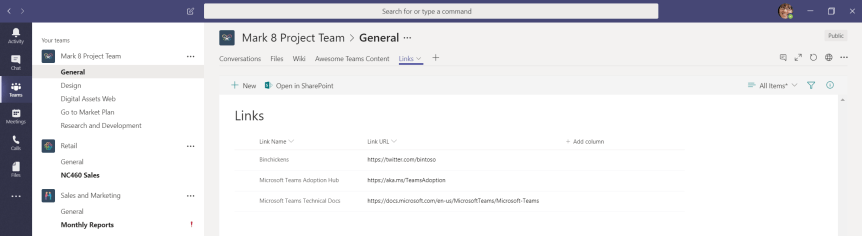
10.) Select New and add the links, keeping the Title the same as the Name. The outcome should be a set of links as shown below.
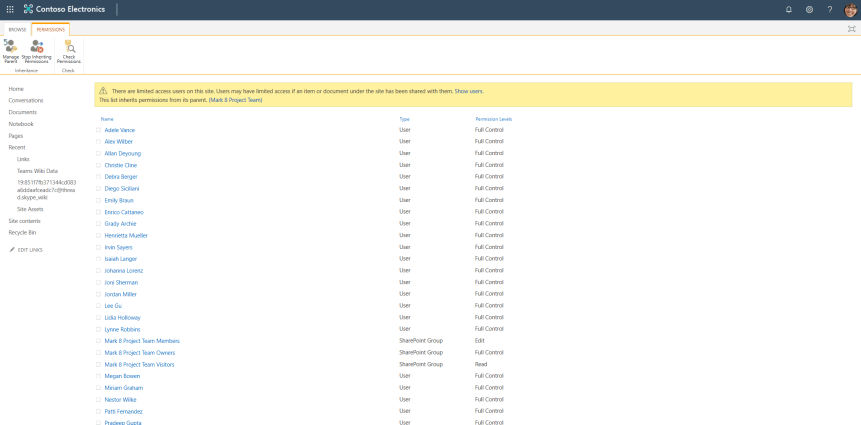
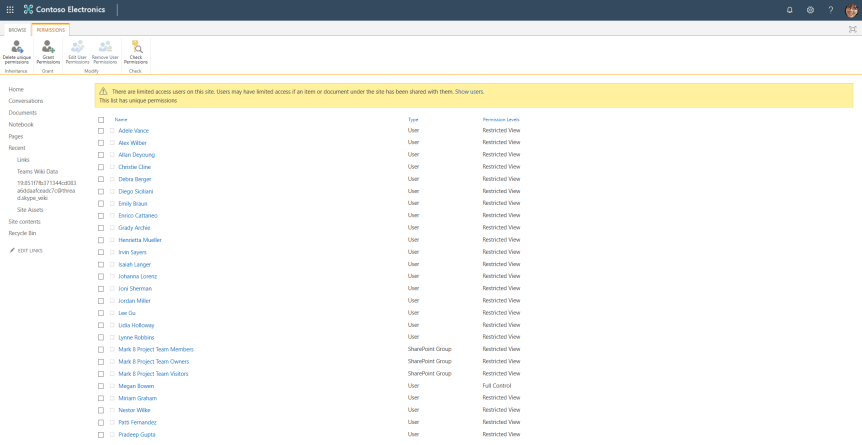
11.) To restrict who can add, edit and delete links go to Site Contents > Settings > Permissions for this list and then after selecting Stop Inheriting Permissions select all the users who don’t need to manage links and change permissions to restricted view
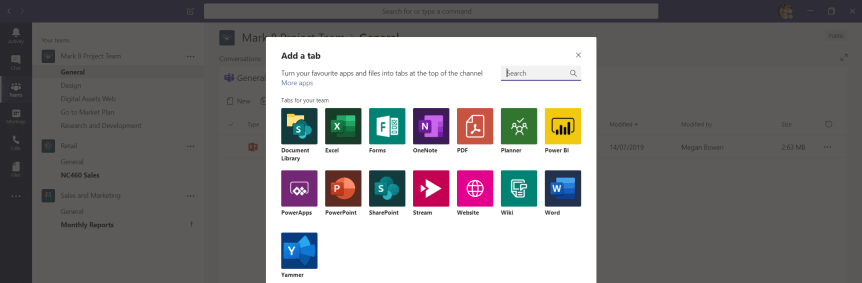
12.) Once done, head back to Teams and in the channel select + to add a tab, then select SharePoint
13.) Select Lists, link the List and then Save. There should now be a set of Links in a Tab which can be added to if users have the permissions to do so, or read only a restricted view has been applied per step 11
The upside of this method is it is easy to control and prevent the creation, editing and deletion of links should the owner of the Team decide. It is also easy to recover should the list be accidentally deleted. The downside of this way is that it takes longer to create, is more complex, the links cannot be sectioned like the wiki and the links cannot be searched. This may not be an issue if the set of links is small, but if the set grows then the owner will likely need better tools to manage them. In addition, whilst internal files housed in Teams work with this method, the length of the URL often exceeds 255 characters which means that the links have to be shortened with an URL shortener. There is no URL shortener native to Teams so this could get confusing for the average user if they see lists with regular and shortened URL’s. The mobile experience works but having to access SharePoint the experience isn’t great.
HOW – METHOD 3 – WEB TAB
1.) Create a web page with links (I.e. in WordPress)
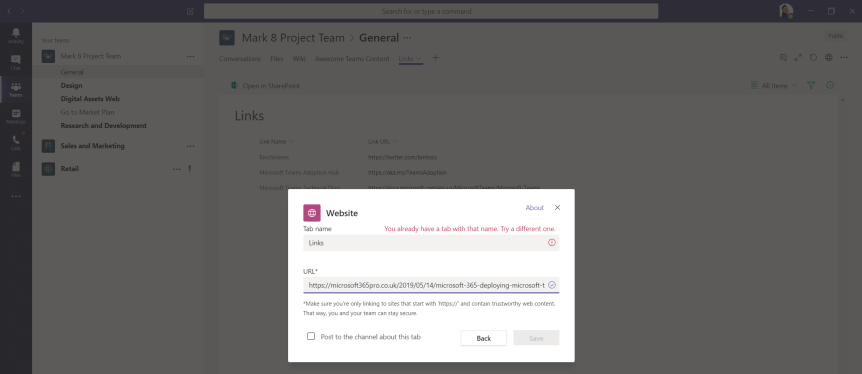
2.) In Teams, in the channel select + to add a tab, then select Website
3.) Complete the Tab Name and URL of the site and select Save
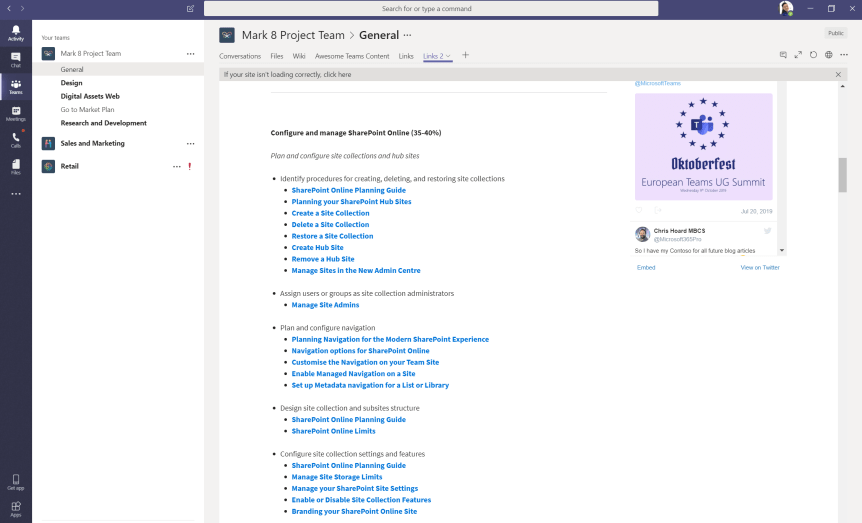
4.) The site should now display
The upside of this method is that you ultimately get the most flexibility over the way the links are presented – especially with coding and not being confined by the limitations of SharePoint or the Wiki. The site can be easily recovered if it is backed up. The downsides are cost and that collaboration isn’t easy even when all contributors have access to the website as it requires another set of credentials (although this could be mitigated with Azure AD SSO). Also, links open within the Teams client not the browser which can make navigation difficult especially considering the absence of a back button. Search and Mobile experience is dependent upon the website and the data ultimately resides outside of the Microsoft ecosystem.
HOW – METHOD 4 – ONENOTE
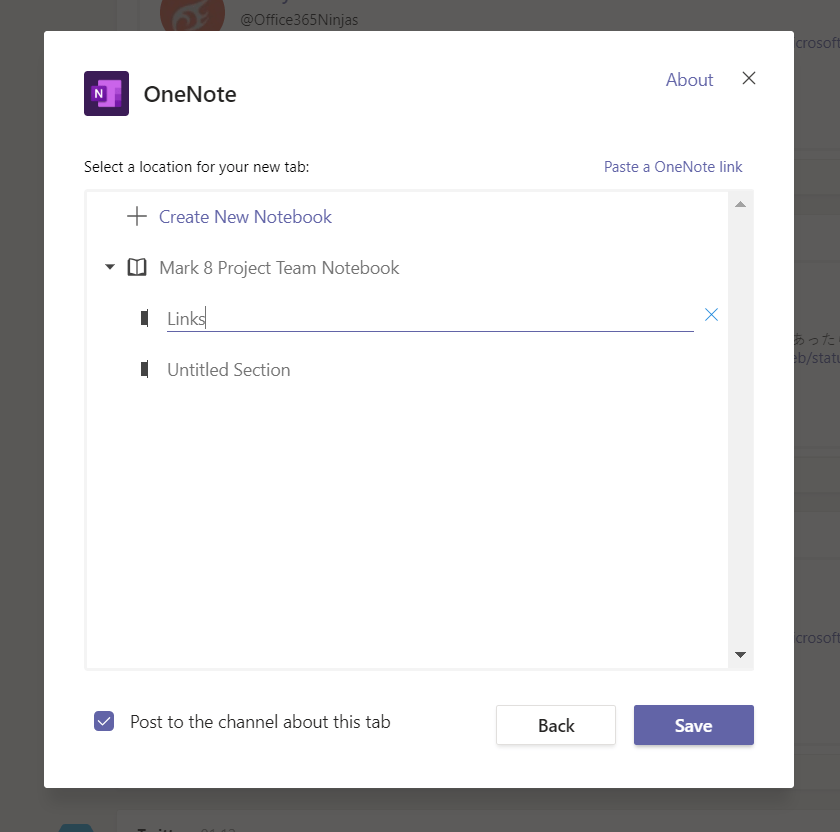
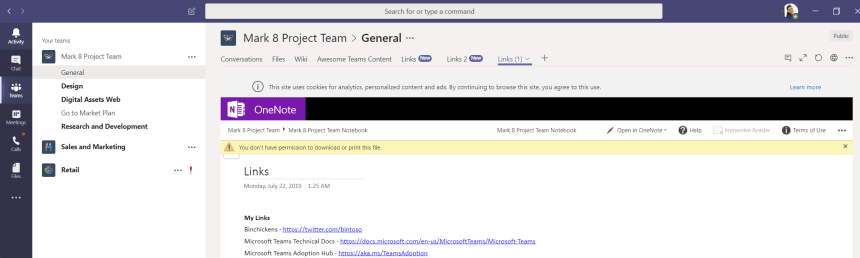
1.) In Teams, in the channel select + to add a tab, then select OneNote
2.) Under the existing Notebook for the Team, select Create New Section and then enter the name of the section (set here as Links) and then Save
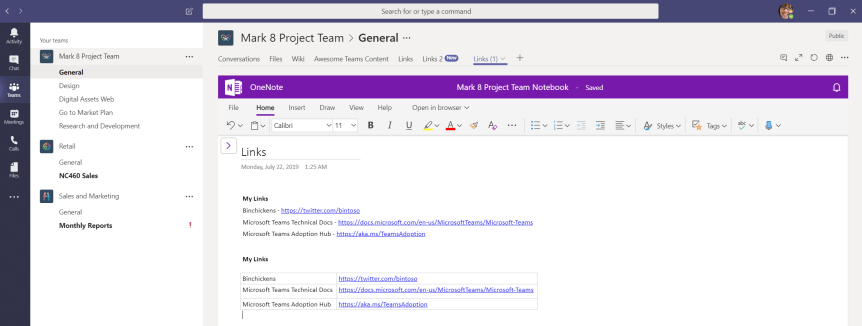
3.) In OneNote, create a raw set of links, or create tables to house your links. It is also possible to create them in sections
4.) To restrict permissions on the OneNote file to control who can create, modify and delete links select the Channel, select Files and then Open in SharePoint. This should direct to the underlying SharePoint Site of the Team
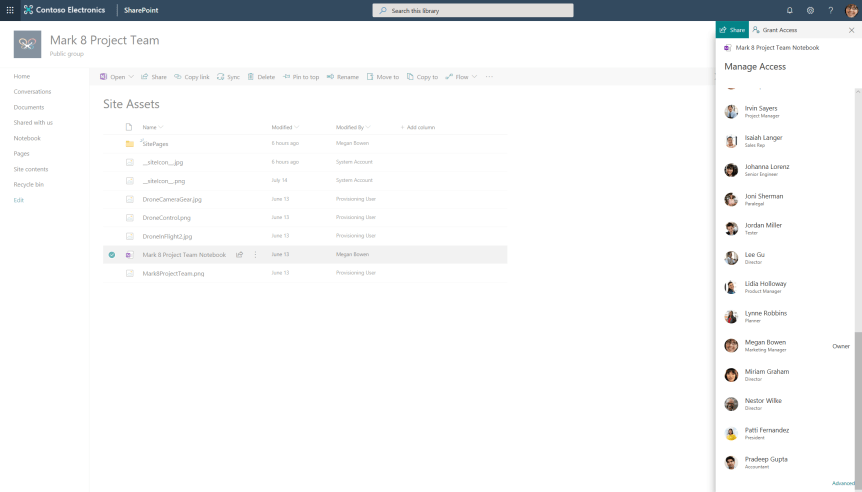
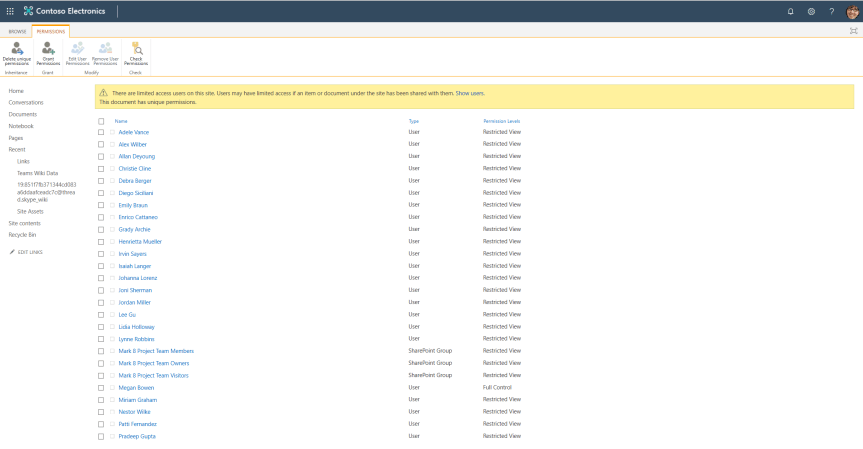
5.) Select Site Contents, then Site Assets and then, highlighting the OneNote file select Managed Access and then Advanced. Similar to method 2 you would stop inheriting all permissions and change all users permissions to restricted view apart from the users making changes
6.) When the user who does not have permissions logs in they won’t be able to add, amend or delete the links
The upside of this method is it is very easy to create and section links and it is very easy to add, delete or amend. Internal files work with this method. There is the ability to control who can add, edit and delete links as well as page history and the OneNote Recycle Bin. Search is possible with Ctrl F and it has built in accessibility with Immersive Reader, Dictation and Reading View. It also seems to have far better performance over the Wiki and does not crash as often whilst editing. The downsides, being picky, is that the mobile experience is dependent on having the OneNote App and some users may get confused by the navigation of the notebook if there are multiple sections with it (It is often advised to remove or educate on multiple sections). Users may also find it confusing if there is a Wiki present (It is often advised to remove the Wiki or educate if the two sit side by side). There is a Teams Uservoice here which actually asks to replace the Wiki with OneNote.
FINAL COMMENTS
Of the ways to create and manage Links OneNote seems to come out the best of the four methods. It is quick to setup, easy to control, easy to search, it has built in accessibility features. All of the data resides within Microsoft. However, as stated at the start it is really down to the Team Owner and the Team to decide which way to go. All ways have pro’s and cons – if one were overwhelmingly above the rest then the formal Microsoft documentation would specify. Microsoft is known to be actively working on the Wiki and perhaps it will reach parity with OneNote at some point in the future.
There are also other ways to create and manage links not mentioned here. Links could be curated in a Word or Excel Document or PDF (all possible to be tabbed), a SharePoint Page or even in a PowerApp. Again, it is what makes sense to the Team – but whatever the way is chosen, it is recommended that OneNote should at least be the benchmark when considering how to create and manage links within Teams.
