

This blog is part of a series on Teams. For more articles, check back often
Written: 18/10/2020 | Updated: N/A
This week I have been on annual leave – and although you would have thought it would have been challenging given Covid and the UK going back into lockdown measures, it’s actually been a good one. First and foremost I have have had a significant amount of time to spend with my family and get a lot of personal projects done. Secondly, I have had some time on the side to build a Microsoft Teams Calling course which I am starting to teach at the beginning of November. Now, being a one day course it can’t possibly cover everything there is to know about calling in Microsoft Teams, but it does go into the fundamentals including planning for calling, phone system functionality, direct routing and day to day management. Now, seeing as I have been writing all week on calling, I thought I would leverage this for a quick win on the blog, and so this week I have chosen to write on how easy it is to set up a call queue in the Teams Admin Centre. Call queues are a really nice feature for managing org wide call distribution. Think of them like being a waiting room in a Doctors surgery, or the deli counter at a supermarket. When callers need to reach someone with a particular specialty – such as sales or service – rather than a specific person, you can use call queues to connect callers to the group of agents who can assist them. Callers are put on hold until an agent assigned to the queue is available to take their call.
Call queues can be used – and often are – with Auto Attendants. However as time is limited today, I will simply focus on the call queue and look at how the two interact later in the series
This blog will cover
- Building a Call Queue
This will also cover number assignment from a calling plan scenario as opposed to direct routing. However, the only real difference is when it is time to assign the number to the call queue you would leverage Powershell to run the following command using the Skype Module or – now – the unified Teams module (1.1.6)
Set-CsOnlineApplicationInstance -Identity [identity] -OnpremPhoneNumber [+Number] |
WHY WOULD WE DO IT?
- To manage call distribution
- To manage call volume
PREREQUISITES
In order to build the call queue you will need
1.) A resource account
2.) A Phone System Virtual Licence (or a Phone System Licence in the event you don’t have a virtual one)
3.) A Service Number if the call queue is going to be directedly diallable
4.) Voice Administrator, Teams Administrator or Global Admin Permissions to do the configuration. If you intend to send the call group
HOW – SETTING UP A CALL QUEUE
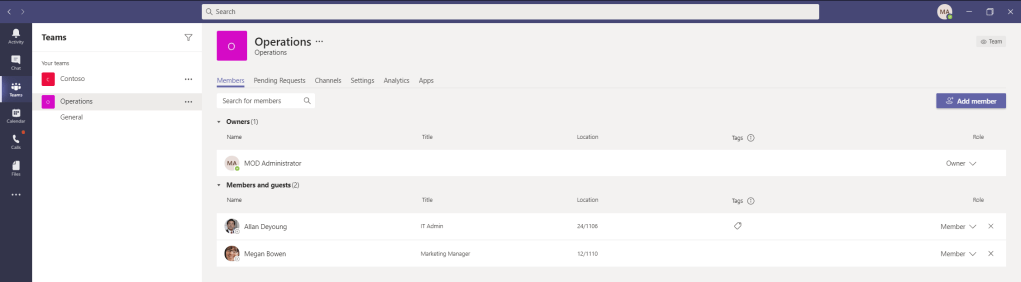
Scenario: In my business, I have a newly created Team called Operations. This team consists of three people. They are Megan Bowen, Allan Deyoung and MOD Administrator. Now, I want to add a number to call operations but also a call queue where people can wait in line if the team if busy on calls with other staff and customers. I don’t want them on the switchboard (auto attendant) because I don’t want that level of visibility
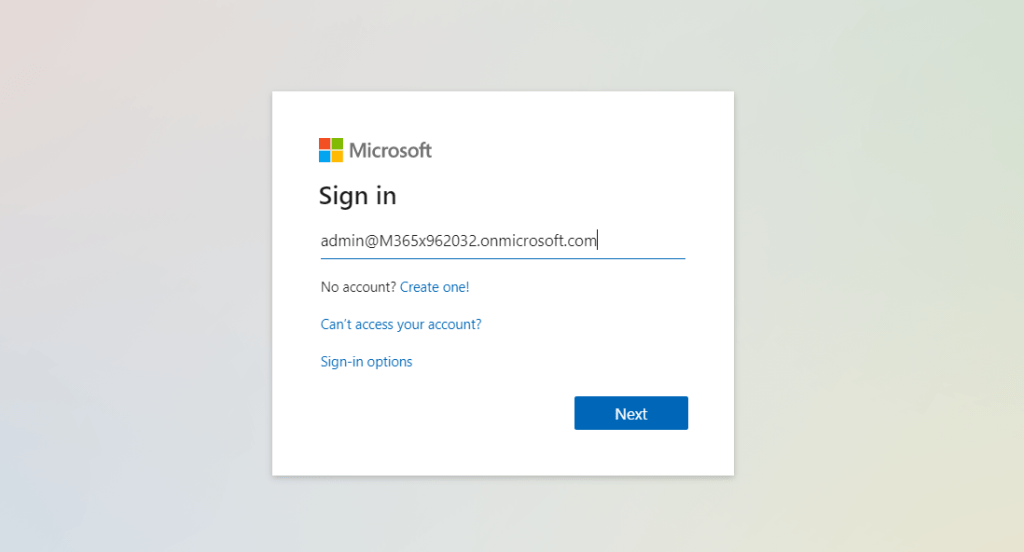
- Login to https://login.microsoftonline.com
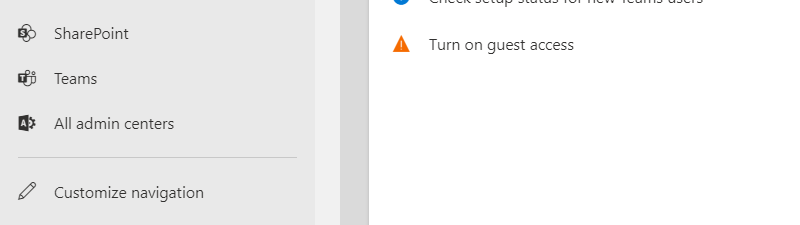
2.) Select Admin from the app rail on the left
3.) Select Teams under Show All to get to the Teams Admin Centre
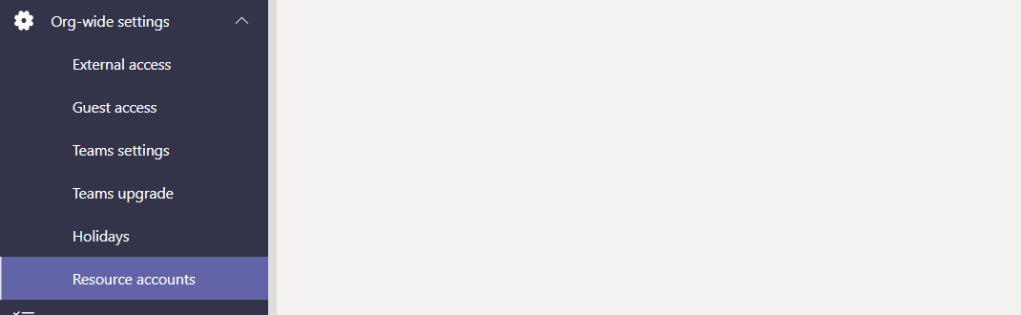
ADDING THE RESOURCE ACCOUNT
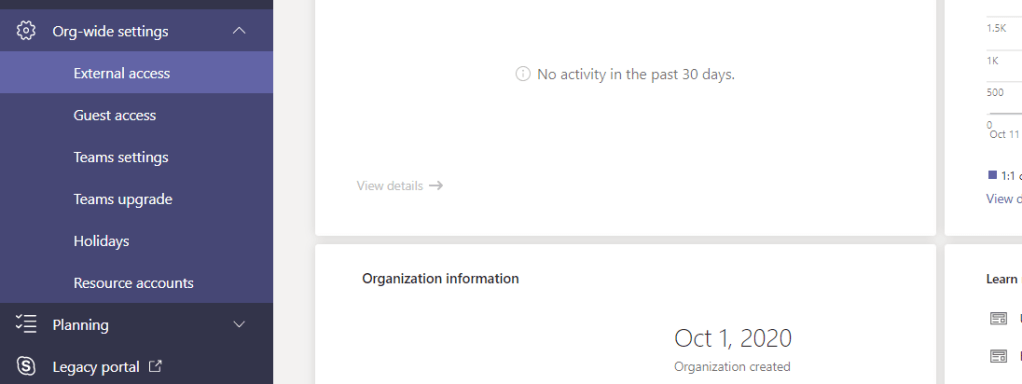
4.) In the Teams Admin Centre select Org Wide Settings then Resource Accounts
5.) Select Add

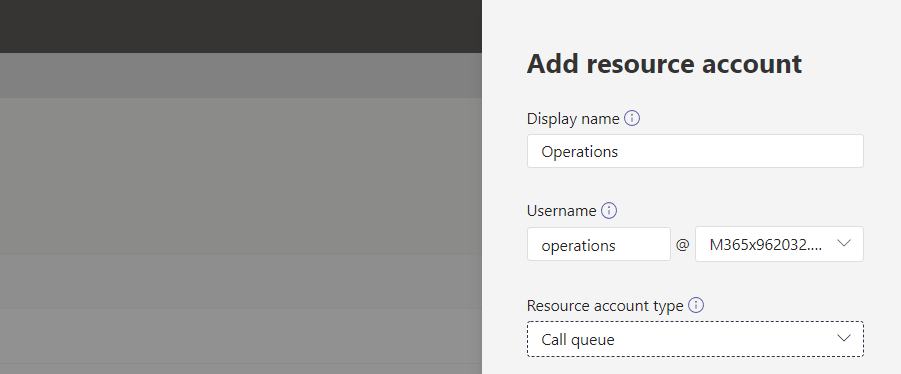
6.) Add the Resource Account details, including name, username and resource account type. Select Call Queue for resource account type. Select Save once complete
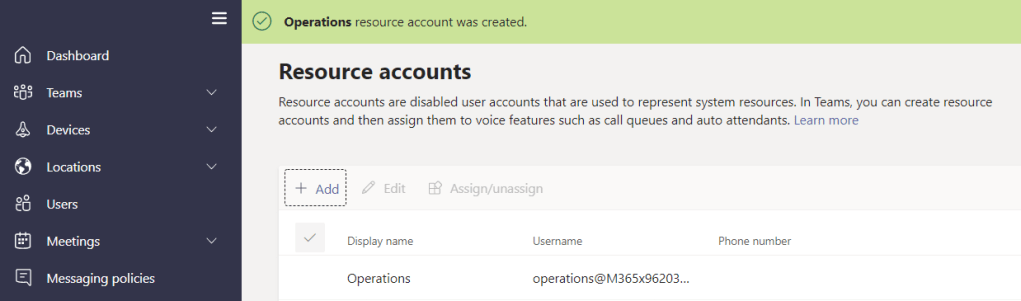
7.) The Call Queue is now setup
ASSIGNING THE PHONE SYSTEM VIRTUAL LICENCE TO THE RESOURCE ACCOUNT
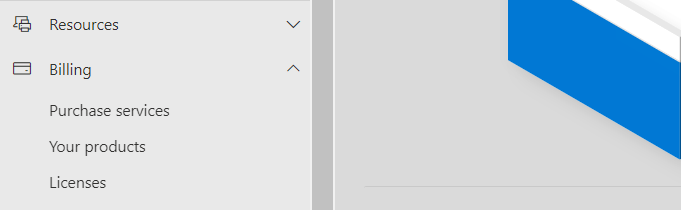
8.) Go back to https://admin.microsoft.com/ and select Billing then Purchase Services
9.) Scroll to the bottom and select Add Ons

10.) Select the free Microsoft 365 Phone System Virtual User and go through the ordering process to order a licence. Note, even though the licence is £0.00 you still have to submit credit card details.

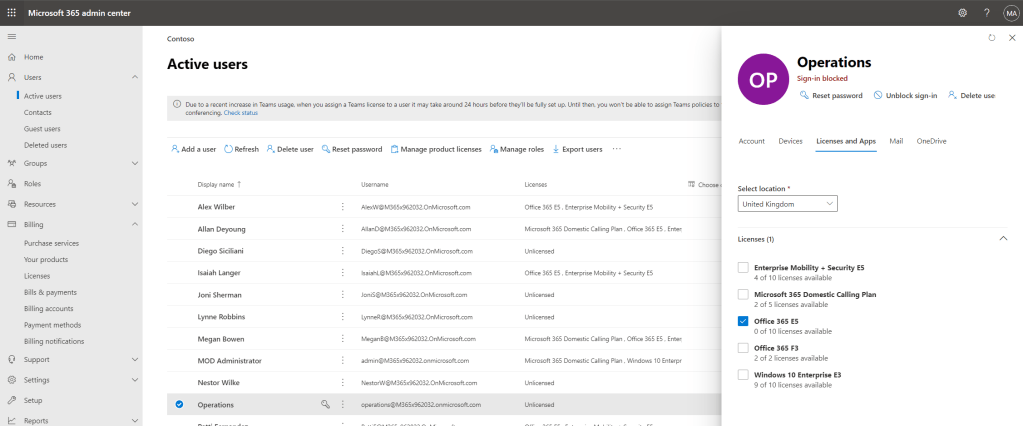
11.) Once ordered go to Users, then Active Users, select the newly created resource account and assign it the Microsoft 365 Phone System Virtual User licence. If – for whatever reason – you cannot order the virtual user licence then you can make it work by assigning a paid phone system licence which you can get through an E5 licence, E1/E3 with Phone System Add On or a Business Voice licence.
BUILDING THE CALL QUEUE
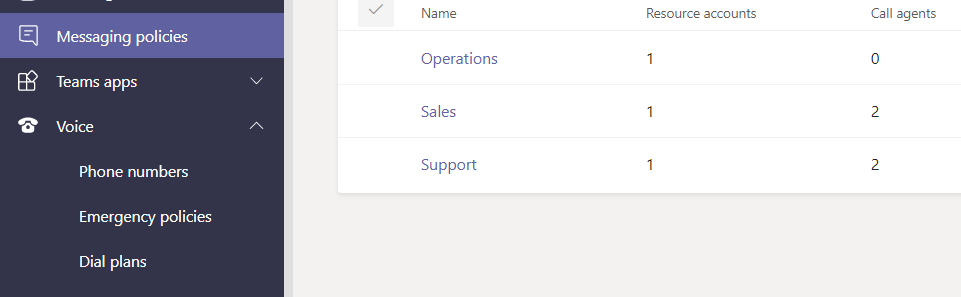
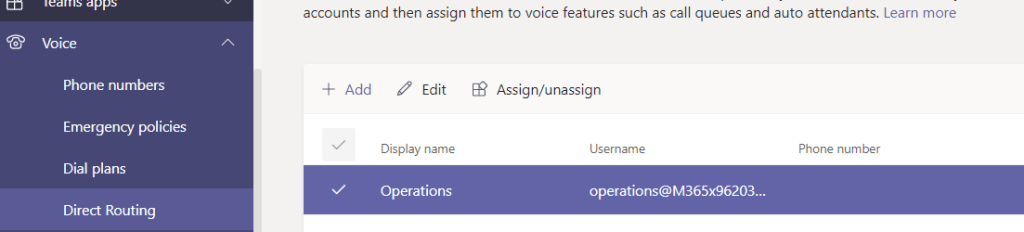
12.) Now the resource account has a Microsoft 365 Phone System Virtual User licence attached we are ready to build the queue. Return to the Teams Admin Centre and select Voice and then Call Queues

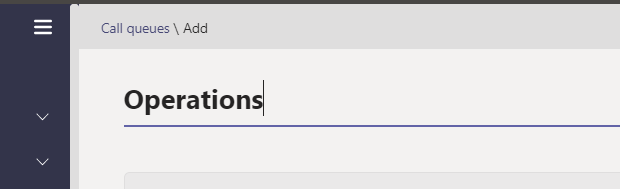
13.) Select Add

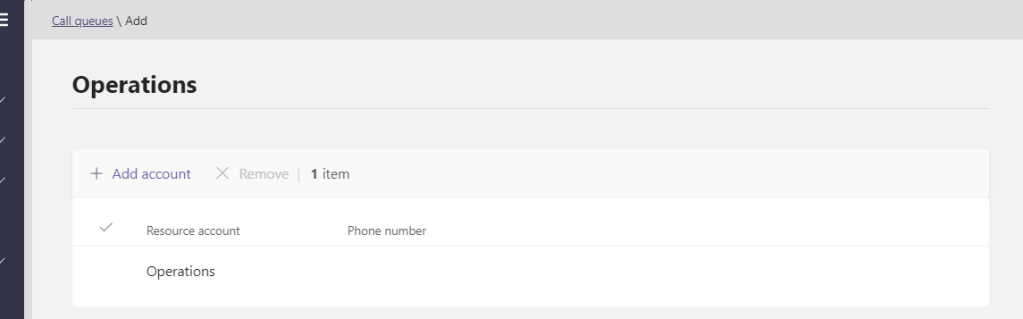
14.) Provide the Call Queue name. Since this scenario is building a call queue for the Operations Team it makes sense to call it Operations
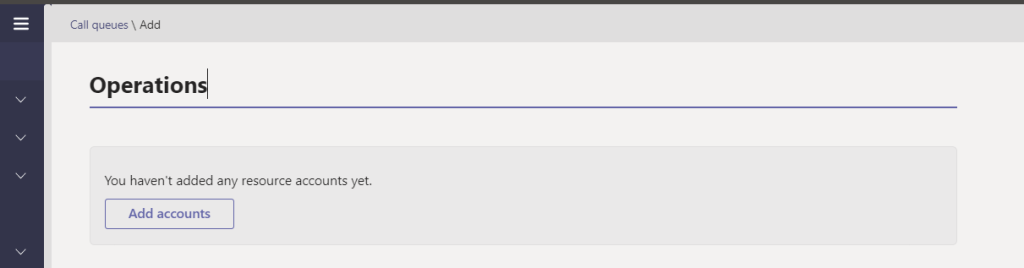
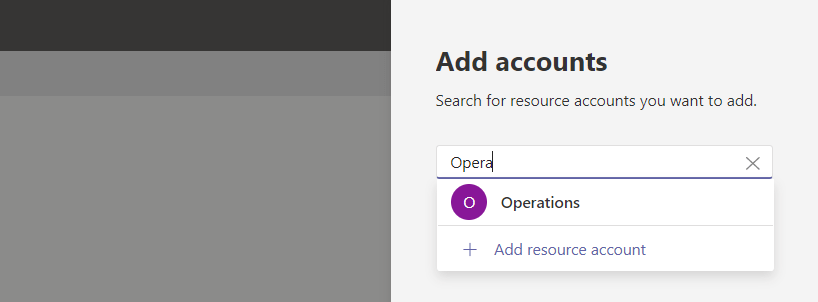
15.) Now select Add Accounts. Search for and select the resource account and then select Add to add it
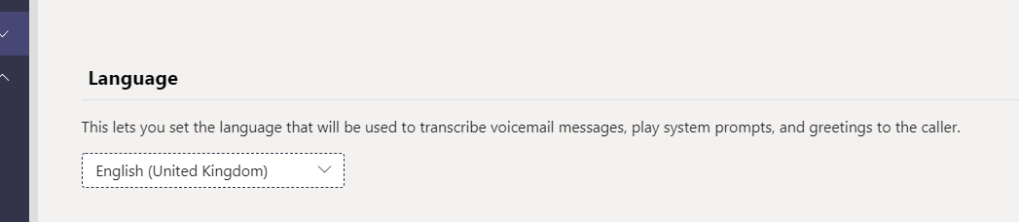
16.) Select the Call queue language. You may wish to have multiple call queues in different languages for multi lingual teams
17.) Select whether you want to have a greeting when first on the call. Since there is no text to speech option the only way to have a greeting currently is to record and upload one. MP3, WAV or WMA files under 5Mb are supported

18.) Select the hold music. You can use the default provided by Microsoft or play an uploaded audio file. Again, MP3, WAV or WMA files under 5Mb are supported

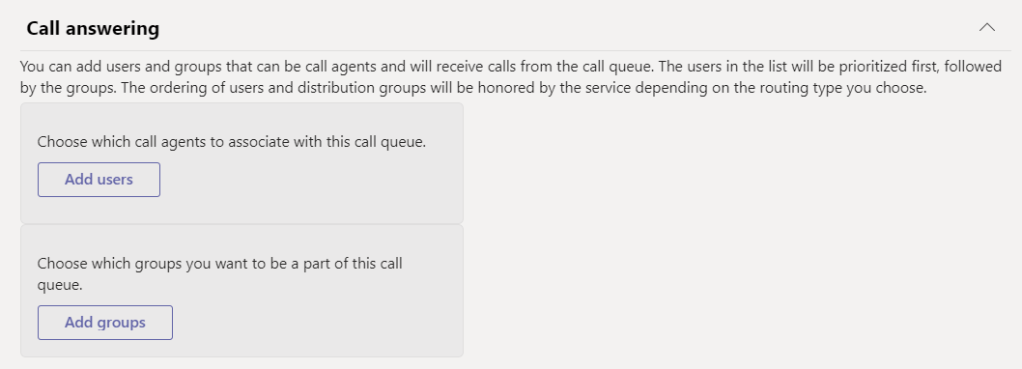
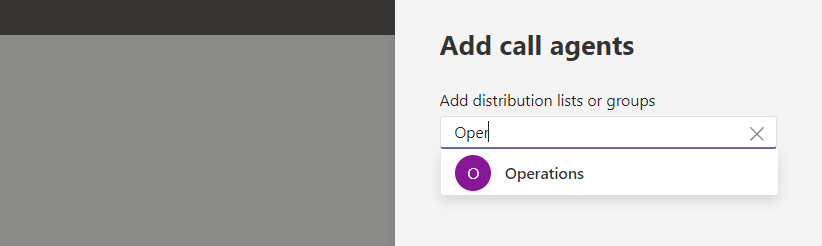
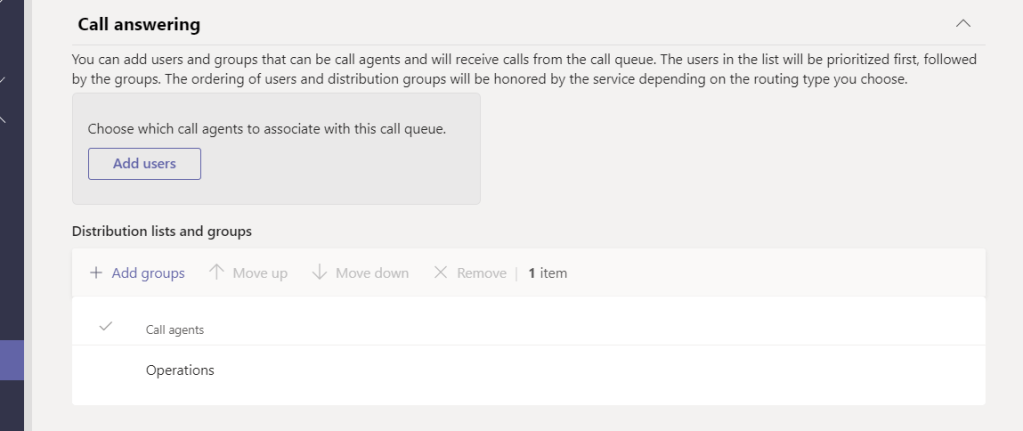
19.) Set the call answering users/groups. In this scenario the call queue is going to the operations team and this team has both a team within Teams and an associated Microsoft 365 Group so I select Add Groups then add the Operations Group (the M365 Group linked to the Team) and select Add. Note, this supports M365 Groups, Security Groups and Distribution Groups
20.) Select whether conference mode is on or off. This optimises the connection time when call agents answer calls from the call queue, however there are prerequisites including the call agents being in Teams Only mode. Andrew Morpeth does a good blog on it here

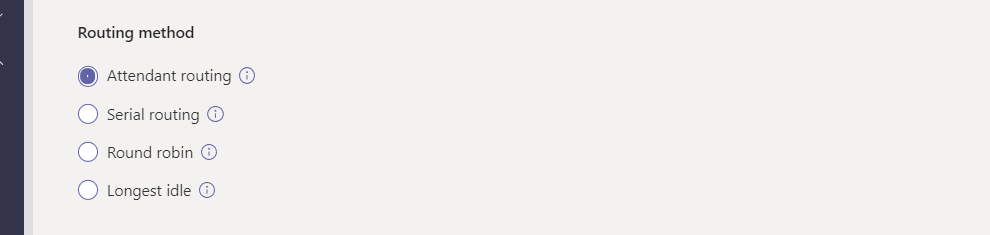
21.) Select the routing method – how call agents will answer calls. Attendant Routing means ringing all call agents at the same time. Serial routing means ringing call agents one by one. Round Robin means each call agent will receive an equal amount of calls from the queue and therefore the load is equally distributed. Longest Idle is based on the call agents presence and who has been in available status the longest
22.) Select if presence based routing will be used. When this is turned off its means that the routing method will ring call agents regardless of their presence status. So for example, even if a call agent is set to busy it will ring (except for Longest Idle). If this is turned on, call agents will only receive calls when they are in a presence state of available

23.) Select whether call agents can opt out of the call queue through the options in the Teams client. A reason for leaving this on, for example is that an agent may wish to opt out during lunch hour

24.) Set the alert time which specifies how long an agent’s phone will ring before the queue redirects the call to the next agent

25.) Set the call overflow which means what happens after the maximum numbers of calls queued has been reached. You can set the calls to simply disconnect. However, you can also set them to redirect elsewhere and here you have a choice between an external number, a voice app (which is another call queue or auto attendant) or voicemail. As shown below I have set the redirect to another call queue where the support team can help pick up the calls

26.) Select the call time out handling. This is important as you may not want customers getting frustrated from being on hold. Like overflow, you can set the calls to simply disconnect. You can also set them to redirect elsewhere and here you have a choice between an external number, a voice app (which is another call queue or auto attendant) or voicemail. Again, I have set the redirect to another call queue where the support team can help pick up the calls and not have callers wait too long

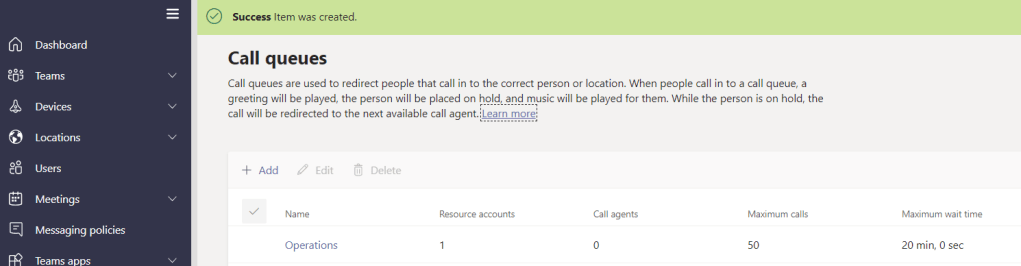
27.) Once all the settings are done, select Save and the Call Queue will now be created
ORDERING AND ASSIGNING A NUMBER TO THE CALL QUEUE
This process will simply run through ordering a new service number for the call queue and assigning it in a calling plan scenario. In reality you may have a direct routing setup and as shown in the introduction, you will need to use Powershell to assign the number to the call queue. You may, if you are moving to calling plans and Teams from a legacy solution, need to port your service number across to which you will need to either leverage the Porting Wizard (if you are in the UK, US and Canada) then assign, or submit a porting request to Microsoft before assigning
28.) In the Teams admin centre select Voice and then Phone Numbers
29.) Select Add
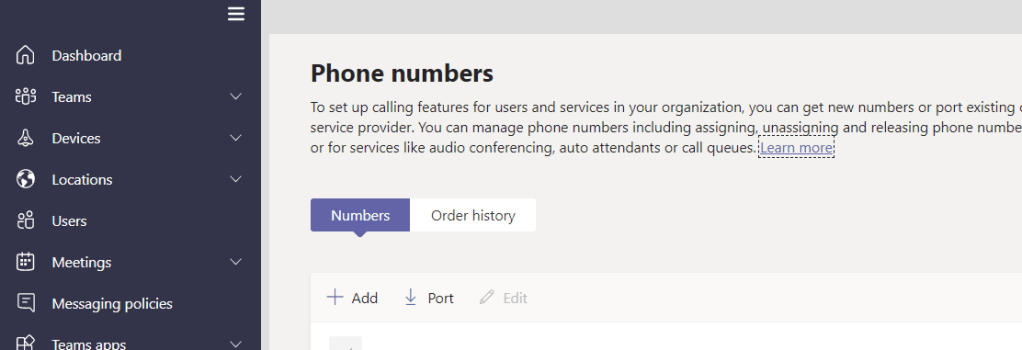
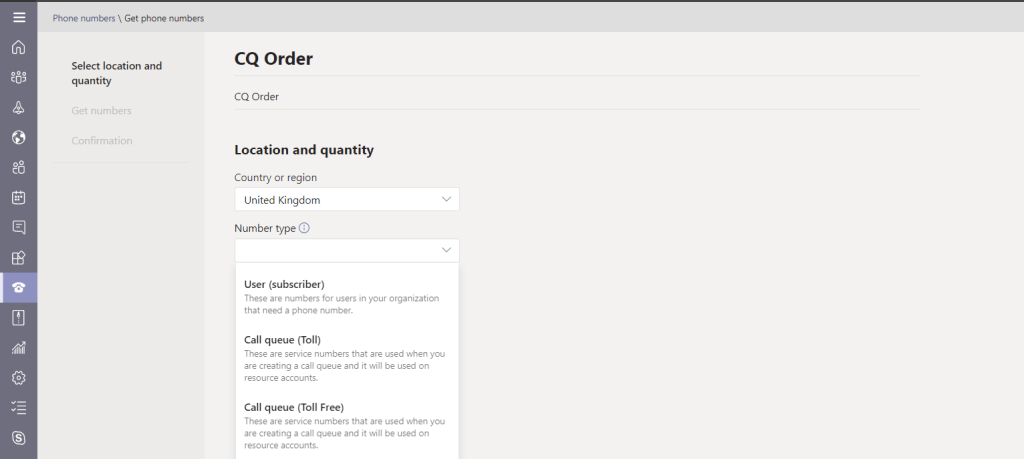
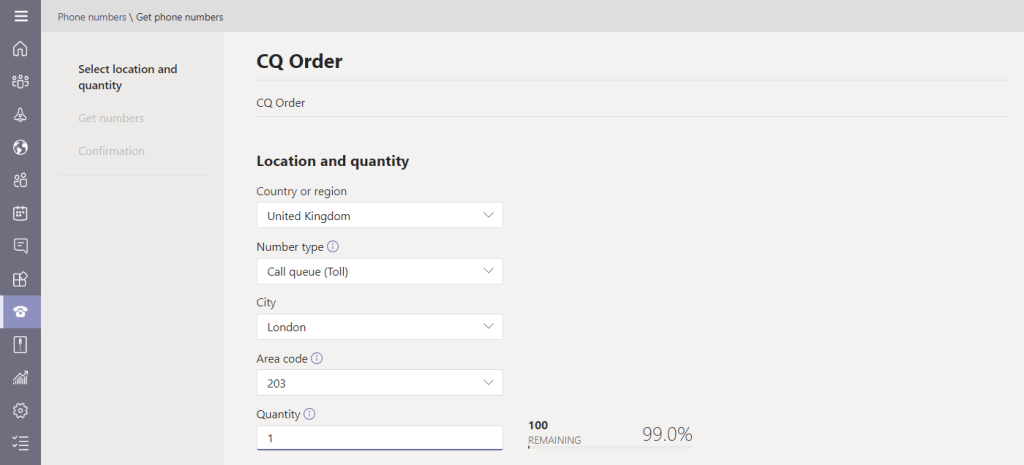
30.) Select a name, description, the location and the type of service number you want for the call queue. Toll numbers will bill the customer whereas Toll Free will bill your organisation. If you select Toll Free you will need to ensure you are set up for communication credits. This example will use a Toll Number. Then Select a city, area code and the quantity of service numbers required. Once done, select Next
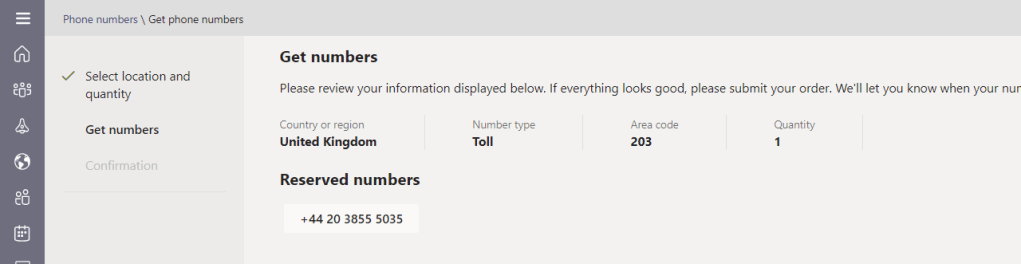
31.) Review the reserved number and select Place Order
32.) Select Finish

33.) Return to Org Wide Settings, then Resource Accounts
34.) Select the resource account and then Assign/Unassign
35.) Select Phone Number Type as Online if the number is a Toll number, set the assigned phone number as the service number purchased and the assigned to field should be pre-populated. Select Save. It is important to note that the Microsoft 365 Phone System Virtual User licence should be on the resource account by this time otherwise no phone numbers will display here for you to assign to the resource

36.) The number is now assigned to the call queue

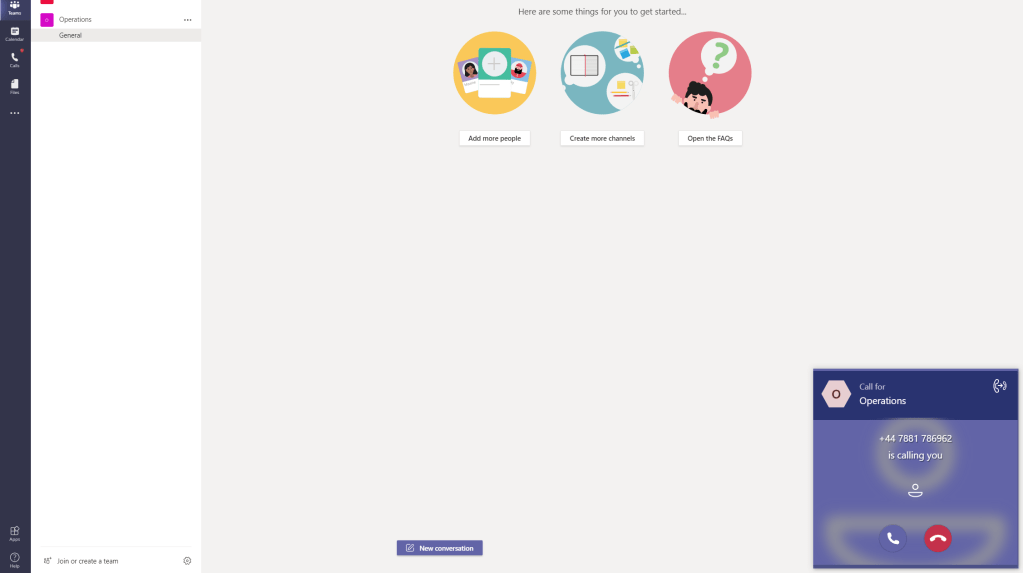
Our job here is done. The call queue is built and the number assigned. This process, end to end takes no more than 15 minutes. It is working too – as I just called the number
Thanks again for taking the time to read. Have a great week
BUILDING CALL QUEUES IN POWERSHELL
A call queue can just as easily be built using Powershell. Here is the key article from docs.com
https://docs.microsoft.com/en-us/powershell/module/skype/new-CsCallQueue?view=skype-ps
An example Microsoft provide would look like this
New-CsCallQueue -Name “Help desk” -RoutingMethod Attendant -DistributionLists @(“8521b0e3-51bd-4a4b-a8d6-b219a77a0a6a”, “868dccd8-d723-4b4f-8d74-ab59e207c357”) -AllowOptOut $false -AgentAlertTime 30 -OverflowThreshold 15 -OverflowAction Forward -OverflowActionTarget 7fd04db1-1c8e-4fdf-9af5-031514ba1358 -TimeoutThreshold 30 -TimeoutAction Disconnect -MusicOnHoldAudioFileId 1e81adaf-7c3e-4db1-9d61-5d135abb1bcc -WelcomeMusicAudioFileId 0b31bbe5-e2a0-4117-9b6f-956bca6023f8
CALL QUEUE RECOMMENDATIONS
- Use a greeting if you are only using a call queue without an auto attendant as the caller will go straight into hold music
- Only assign numbers to call queues if the call queue is staffed 24/7 because call queues don’t have working hours or holidays like Auto Attendants. If you want this functionality, build and auto attendant on top of the call queue
- Use conference mode where possible
- Use voicemail or other call queues for overflow and time out handling
- In high volume queues, attendant routing is recommended
- Negotiate the routing with the Team as it can be contextual. For example, in a support context round robin or longest idle may be seen as more fair, whilst in sales and departments where KPI’s are based on phone metrics, attendant routing may be seen as more fair
- Negotiate with the team whether opt out or presence based routing is the fairer option. You want to ensure that everyone can take break time without the fear that calls are being dropped. Whilst presence based routing may seem the obvious choice, opt out has the advantage of being able to come out of the queue (I.e. for focus work) whilst still showing availability within the organisation

2 thoughts on “Teams Real Simple with Pictures: Building a Call Queue”
Comments are closed.