This blog is part of a series on Teams. For more articles, check back often
Written: 15/10/2023 | Updated: N/A
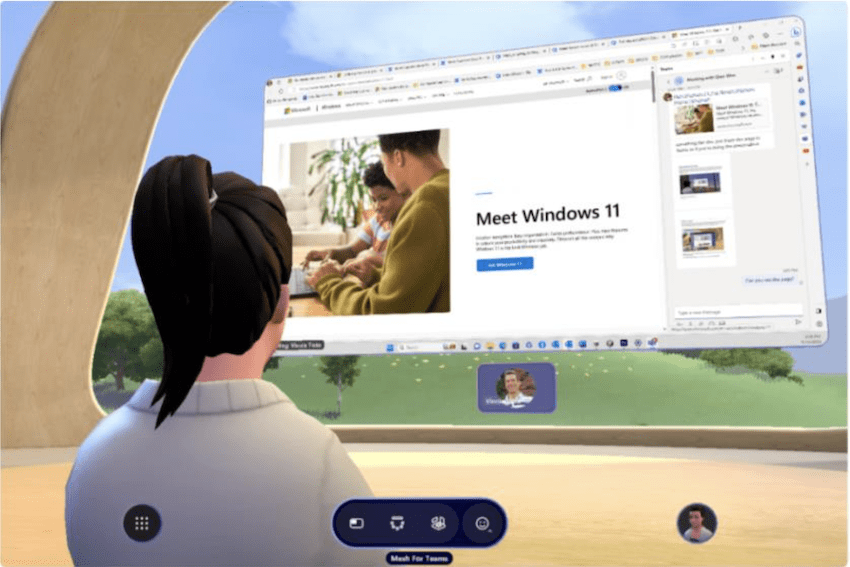
Last week we looked at the new Town Hall functionality set to replace Teams Live Events. And as promised we are going to venture again into the meeting/events space by looking at the introduction of Mesh Immersive Spaces into public preview. For many, these spaces will constitute the next step forward with Microsoft Mesh after the introduction of Avatars into Teams. But what are they? By definition they are ‘three-dimensional (3D) immersive space(s), helping virtual meetings/events feel more like face-to-face connections. [They] have unique attributes that create a perception of being physically together [with]in a 3D digital space, including spatial interaction, co-presence, and immersion’ (Microsoft, 2023). In other words they are designed to be active meeting experiences as opposed to passive, and to have a level of immersion which you may not get from a standard Teams meeting, or even an in person experience. And whilst on the face of it they may seem to be a natural fit for remote workers or orgs which operate in hybrid in order to equalise the meeting experience, they are very much as you will discover applicable for all. If you have ever used platforms such as the recently retired AltSpaceVR you may already be familiar with such an experience in principle. Now it is here in the Microsoft Teams classic client; soon to be 2.1. It’s time to try it out – and I am pretty sure I’ll be writing many more blogs on Microsoft Mesh over the coming year as this is just the tip of the iceberg. Its good to see Microsoft prrogressing with their Metaverse offering.
Let’s go.
This blog will cover
- Ensuring that the Mesh Immersive Spaces app is enabled
- Ensuring Avatars are created
- Launching a Mesh Immersive Space within a Meeting
- Basic operations
- Q&A
Note this blog will have abridged steps which will assume some experience with Microsoft Teams and the Microsoft Teams Admin Centre. All blogs will use the new Teams Desktop Client 2.1+ where possible. This is configured in a Ring 4 test tenant and the desktop client is used with Windows 11 Enterprise
Prerequisites
- Microsoft Teams licence (within Microsoft 365 licence) for testing. For immersive spaces in Teams, licenses for one of the following: Teams Essentials, Microsoft 365 Business Basic, Microsoft 365 Business Standard, Microsoft 365 Business Premium, Microsoft 365 E3/E5, and Office 365 E1/E3/E5.
- Global Administrator or Teams Administrator Role for Teams Admin Centre configuration
- Setup of Avatars (see here, also discussed in article)
ENSURING THAT THE MESH IMMERSIVE SPACES APP IS ENABLED
First things first, let’s validate that the Mesh Immersive Spaces App is enabled and ready to use
1.) Log into https://login.microsoftonline.com and select Admin from the left rail or waffle

2.) In the Microsoft 365 Admin Centre select Show All from the left navigarion, then select Teams

3.) In the Teams Admin Centre, select Teams Apps then Manage Apps

4.) Search for and select Mesh Immersive Spaces
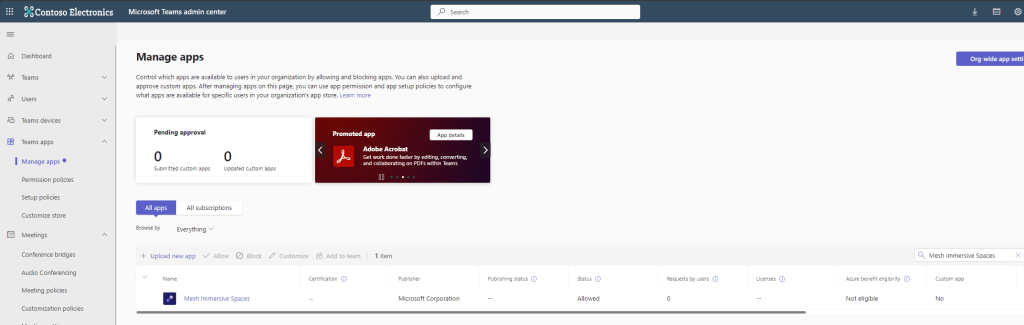
5.) Ensure Mesh Immersive Spaces is Swiped On

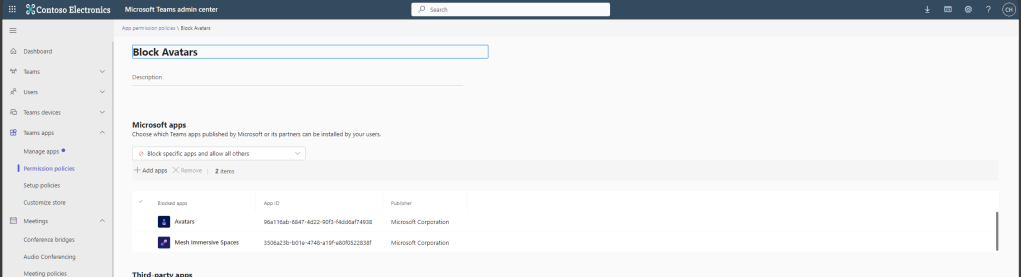
6.) As with any app in Teams, you can disable the Mesh Immersive Spaces app if you don’t want the org to use it, or if you don’t want specific users to have access to the app, or only want specific users to use the app, you can configure App Permission Policies,
7.) Since Mesh Immersive spaces is in Preview, it is also recommended to double check that Show Teams Preview Features is on whether it is on for everyone, on for users in current channel or opt-in. This can be configured within the Teams Update Policy

At this point, with Mesh Immersive Spaces enabled, and permitted within the app permissions policy, and preview features confirmed as on, we can move on to create our Avatars to use within Immersive Spaces.
ENSURING AVATARS ARE CREATED
Now the app is ready and permitted within the Teams Admin Centre, we need to ensure that our Avatars are ready to use. The previous blog outlined how to do this – and at the time of writing Avatars can now also be created and used in the new Teams 2.1. client. At least one Avatar should be created to use within the Mesh Immersive Space.

LAUNCHING A MESH IMMERSIVE SPACE WITHIN A MEETING
At the time of writing Mesh Immersive Spaces can only be used within the Classic Client with availability in the new 2.1. client soon. So, at this point, we would revert to the classic client.
1.) Set up a meeting, this can be a Scheduled Meeting, Channel Meeting or Meet Now

2.) Join the meeting as normal

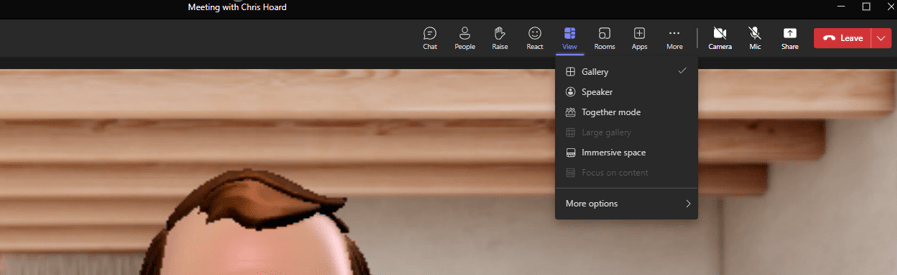
3.) Select View and then Immersive Space
4.) Microsoft Mesh starts loading

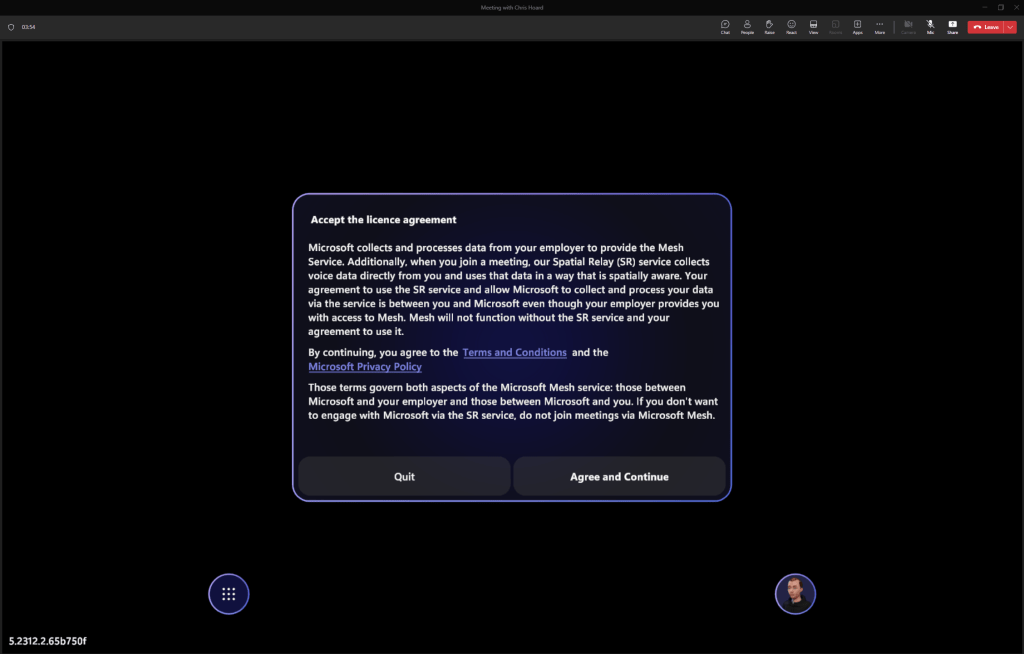
5.) Select Agree and Continue
6.) Select Avatar, Speakers and Microphone and then select Join Now

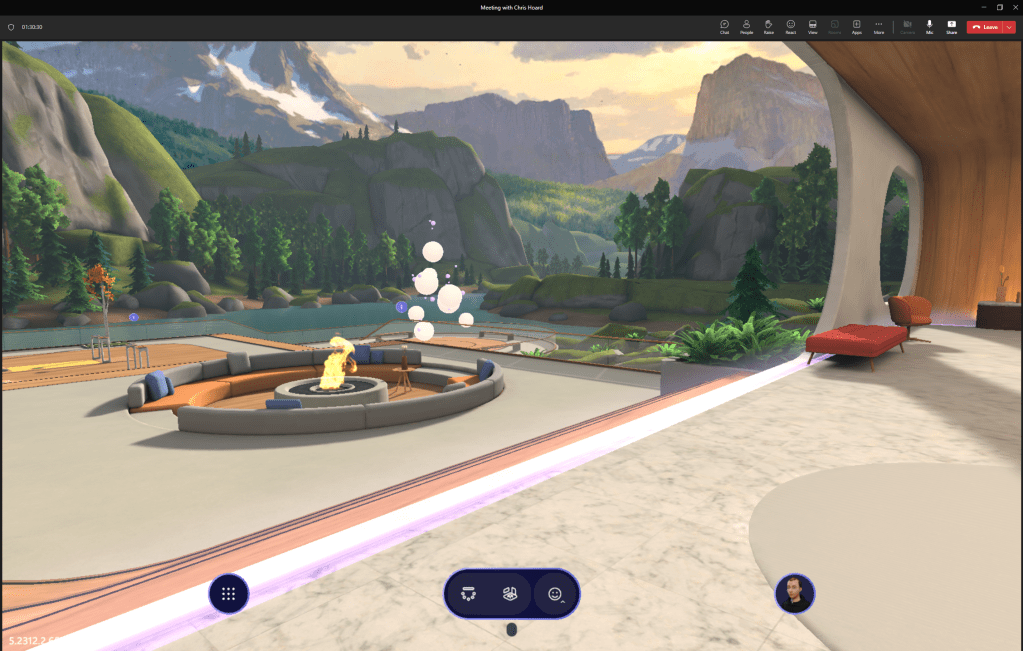
7.) Welcome to Mesh Immersive Spaces

BASIC OPERATIONS
Now we are in the immersive space, let’s try out some basics
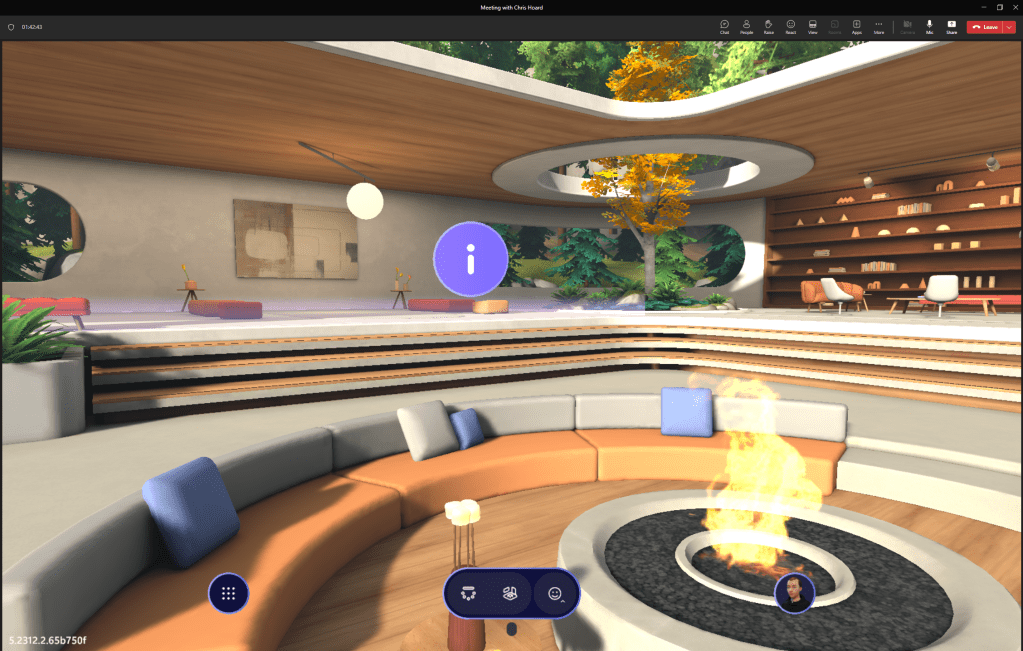
1.) You can can walk around using the Arrow Keys or the W/S/A/D Keys and look around using the Mouse/Touchpad or the Q/E Keys. You can run forward by Holding the W key and explicitly move sideways with the A and D keys. Note holding down Shift with Arrow Keys will also run.
2.) You can Teleport using the T Key

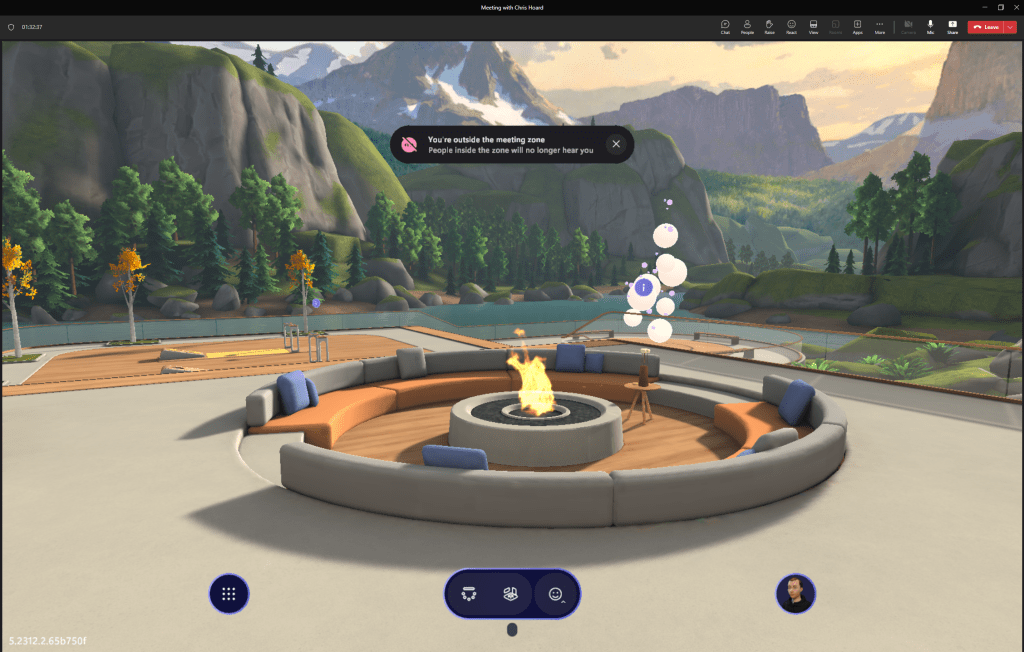
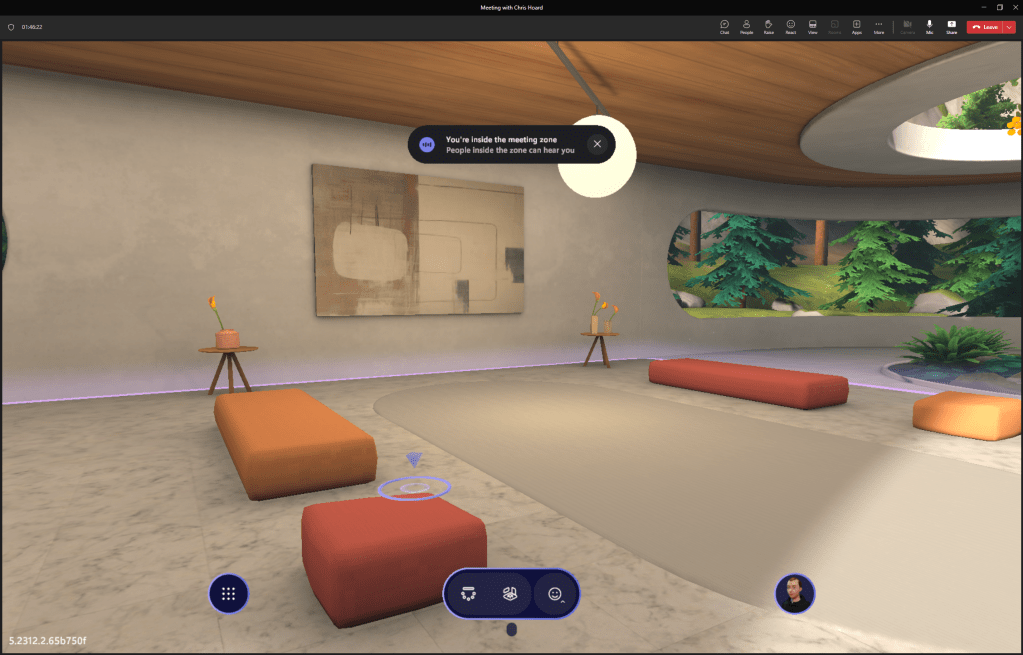
3.) You can move two areas within the space: Inside the Meeting Area and Outside the Meeting Area and this notifies you when doing that. Moving outside the meeting area means that people within the Meeting area will now longer be able to hear you
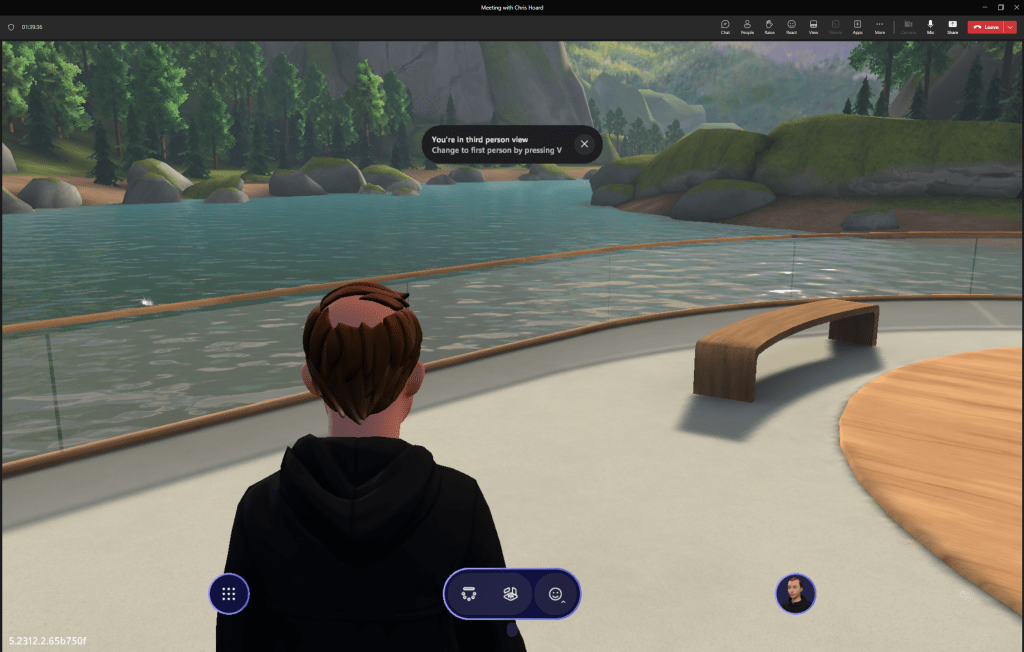
4.) Using the V Key will flip between 1st Person and 3rd Person View
5.) You can interact with many things in the environment, marked with Information Icons or Interaction Icons, such as this example of roasting Mashmellows, or sitting on a chair, or generating questions.


6.) You can even Play Games and compete against others

7.) In the space, from the menu you can use emojis

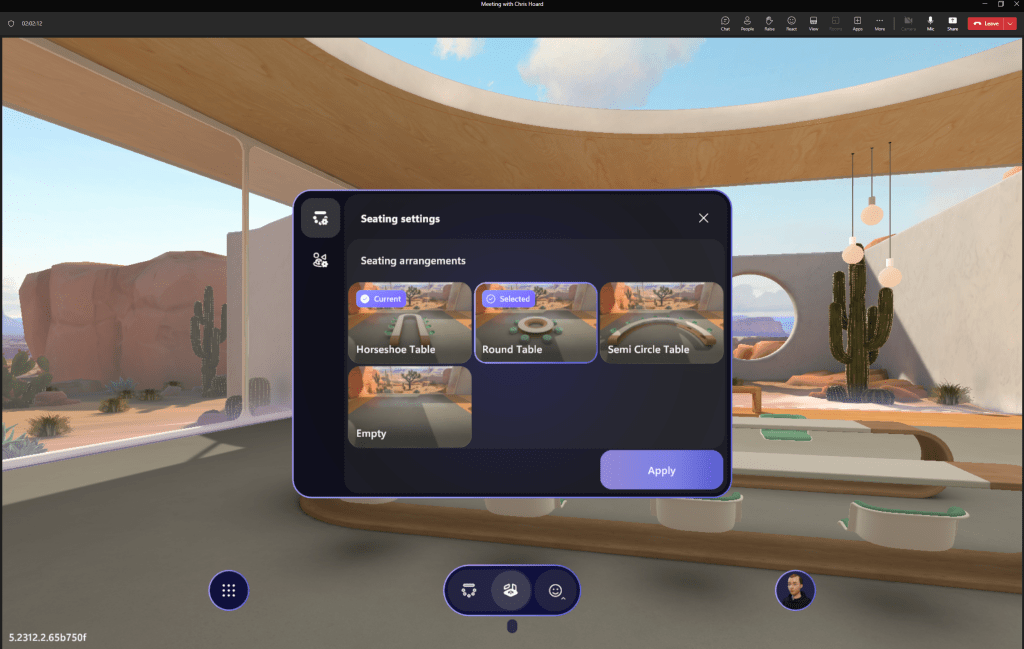
8.) You can set the seat you want for the meeting
9.) You can change the immersive space too. This may take some time as Mesh Downloads the Content if it is the first time in that environment


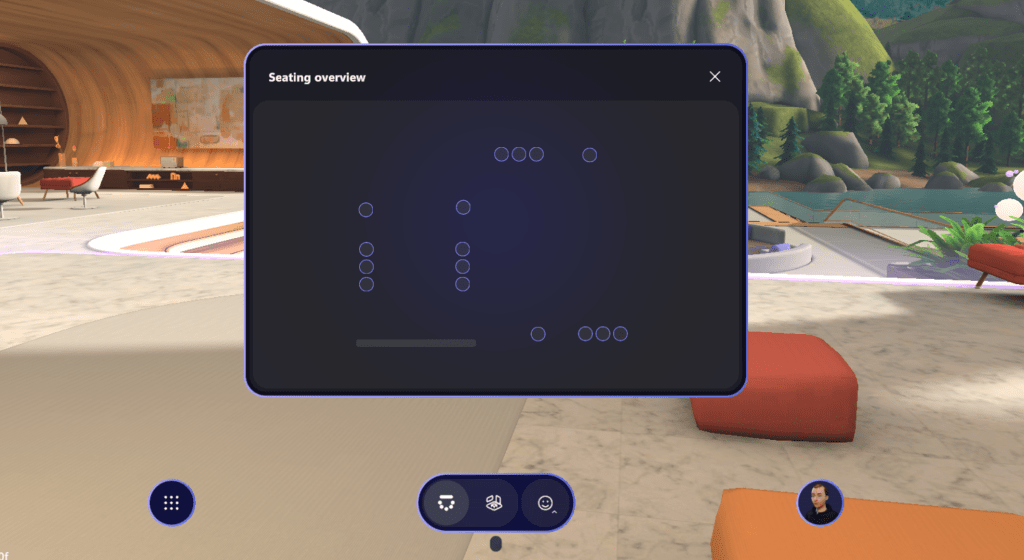
10.) In some spaces you can change the Seating Plan
11.) The ability to Change and Customise Avatar is on the right

12.) Whilst Settings are on the left. This allows you to configure things like the theme, mouse speed and graphic quality.

That about covers it for this week. Hope you enjoyed it, and would recommend you start having a go with others who are open to experiencing it
Q&A
Q.) What is the limit for an immersive space?
A.) Per documentation, 16 at the current time
Q.) Can you record in an Immersive Space?
A.) At the time of writing, in my meeting, no. However, it is likely that it will be so in the future.

Q.) Can content be shared in an immersive space?
A.) Yes it can. At the time of writing I had the option to share window or screen – but not PowerPoint Live, or Excel Live or any other option. In addition, I could not see the content I shared within the Immersive Space so either at the time of writing its a.) Not there yet on the version I have, or b.) Only others can see the content in the Immersive Space. Being able to see your own shared content in the space would be awesome